Rice sounds simple. Two ingredients, one pot, done. So why does it still go wrong so often? You’ve probably ended up with a scorched layer stuck to the bottom, or a gluey clump that resembles wallpaper paste more than dinner. Here’s the good news: rice isn’t temperamental, it’s just precise. Once you understand the actual mechanics of what’s happening in that pot — water absorption, evaporation, starch behavior — the guesswork disappears completely.
This guide walks through every major cooking method, the exact ratios for each rice variety, the mistakes that ruin a batch, and the food safety details that actually matter. Think of it as the reference you keep coming back to, not a recipe you read once and forget.
Quick Facts
Details
Prep time
5 minutes (plus rinsing)
Cook time
15–45 minutes, depending on variety
Total time
20–50 minutes
Servings
1 cup raw rice yields about 3 cups cooked
Cuisine
Global staple (Asian, Latin American, Middle Eastern, Western)
Why the Rice-to-Water Ratio Is the Real Secret
Every grain of rice is mostly starch, and starch behaves in a very predictable way when it meets heat and moisture. As the temperature climbs, the starch granules inside the grain absorb water and swell, eventually losing their tight, crystalline structure — a process called gelatinization. That’s the transformation between a hard, dry grain and a soft, edible one. Once you picture it that way, the “ratio” stops feeling like a magic number and starts feeling like basic chemistry: rice needs enough water to fully hydrate, and no more.
Here’s where most home cooks get tripped up. It’s not just about how much water the rice absorbs — it’s also about how much water evaporates while it cooks. A loosely covered pot on the stove loses far more steam than a sealed rice cooker or a pressure cooker, which is exactly why the same type of rice needs different amounts of water depending on the appliance. Add to that the age of your rice (older grains are drier and thirstier), and you can see why the ratio printed on the bag doesn’t always match what happens on your stove.
Key takeaway: the water ratio isn’t one fixed number — it’s a formula that shifts based on rice variety, cooking vessel, and how sealed that vessel is during cooking.
Choosing the Right Type of Rice for Your Dish
Not all rice behaves the same way, and picking the wrong variety for a dish is one of the most common (and avoidable) kitchen frustrations. Long-grain varieties like basmati and jasmine have a lower starch content, so the cooked grains stay separate and fluffy, which is exactly what you want under a curry or a stir-fry.
Short-grain and medium-grain rice, on the other hand, release more surface starch as they cook, giving you the clingy, slightly sticky texture that makes sushi rice hold together or risotto turn creamy. Neither is “better” — they’re just built for different jobs.
White Rice vs. Brown Rice vs. Everything In Between
Whole grain rice, most commonly known as brown rice, retains its bran, germ, and endosperm, while white rice has been milled and polished so only the starchy endosperm remains. That extra bran layer is exactly why brown rice takes longer to cook and has a chewier, nuttier bite compared to white rice’s softer texture. Whole grain rice isn’t limited to the color brown, either — it also comes in black, purple, and red varieties, all of which keep that same fibrous outer layer intact.
Between these two extremes sit parboiled rice (partially steamed before milling, which locks in more nutrients) and specialty grains like wild rice, which isn’t technically rice at all but the seed of an aquatic grass.
Choosing between them usually comes down to a simple trade-off: white rice cooks faster and pairs more neutrally with sauces, while brown and whole-grain varieties bring more fiber and a heartier texture to the plate. The Nutrition SourceThe Nutrition Source
What You’ll Need — Equipment and Ingredients
You genuinely don’t need fancy gear to cook great rice, but a few basics make the process far more forgiving. A medium saucepan with a tight-fitting lid is non-negotiable for stovetop cooking, since a loose lid lets steam escape and throws off your ratio. Beyond that, a fine-mesh strainer for rinsing, a set of accurate measuring cups (use the same cup for both rice and water), and a fork for fluffing round out everything you need.
♦ If you cook rice often, a dedicated rice cooker or an Instant Pot removes almost all the guesswork, since both trap steam far more efficiently than an open stovetop pot.
On the ingredient side, keep it simple: rice, water (or broth for extra flavor), a pinch of salt, and an optional splash of oil or butter to keep the grains from clumping. That’s genuinely all a great pot of rice requires — everything else is technique.
Rice-to-Water Ratio Chart for Every Rice Type and Method
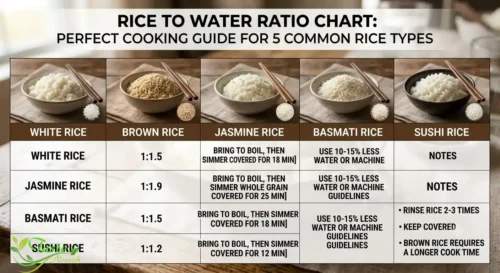
This chart gives you a reliable stovetop starting point for the most common varieties. Rice cookers typically need slightly less water than stovetop cooking because they trap steam, while pressure cookers need the least of all, since almost no moisture escapes during cooking.
Rice Type
Stovetop Ratio (rice:water)
Cook Time
Texture
White long-grain
1 : 1.5 to 1 : 2
15–18 min
Fluffy, separate
Basmati
1 : 1.5
15–18 min
Light, fragrant, distinct grains
Jasmine
1 : 1.25 to 1 : 1.5
15–18 min
Slightly sticky, aromatic
Brown rice
1 : 2 to 1 : 2.25
35–45 min
Chewy, nutty
Sushi/short-grain
1 : 1.1 to 1 : 1.25
18–20 min
Sticky, plump
Wild rice
1 : 3 (or more)
40–50 min
Chewy, split husk when done
Pro tip: if you’re cooking rice at elevations above 3,000 feet, water boils at a lower temperature, so add both extra water and extra cooking time — your grains will need a few more minutes to fully soften.
Step-by-Step: How to Cook Rice on the Stovetop
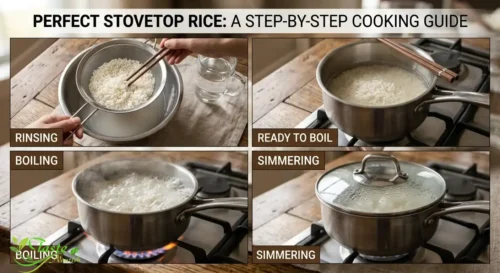
The stovetop method is the most universal skill worth mastering, since it works for nearly every variety and doesn’t rely on a specific appliance. It breaks down into three clean stages: preparing the rice, combining it with the right amount of liquid, and letting heat and steam do the rest of the work undisturbed.
Step 1 — Rinse (or Don’t)
Place your rice in a fine-mesh strainer and rinse it under cold water, swirling gently, until the water runs mostly clear. This step washes away loose surface starch that would otherwise make your finished rice gummy rather than fluffy. The one exception is enriched white rice, where the vitamins are sprayed onto the surface of the grain — rinsing that variety can wash away some of the added nutrients, so check your package if that applies to you.
For basmati or jasmine, a quick 20–30 minute soak after rinsing can also shorten the total cook time and produce noticeably longer, more separated grains.
Step 2 — Measure and Combine
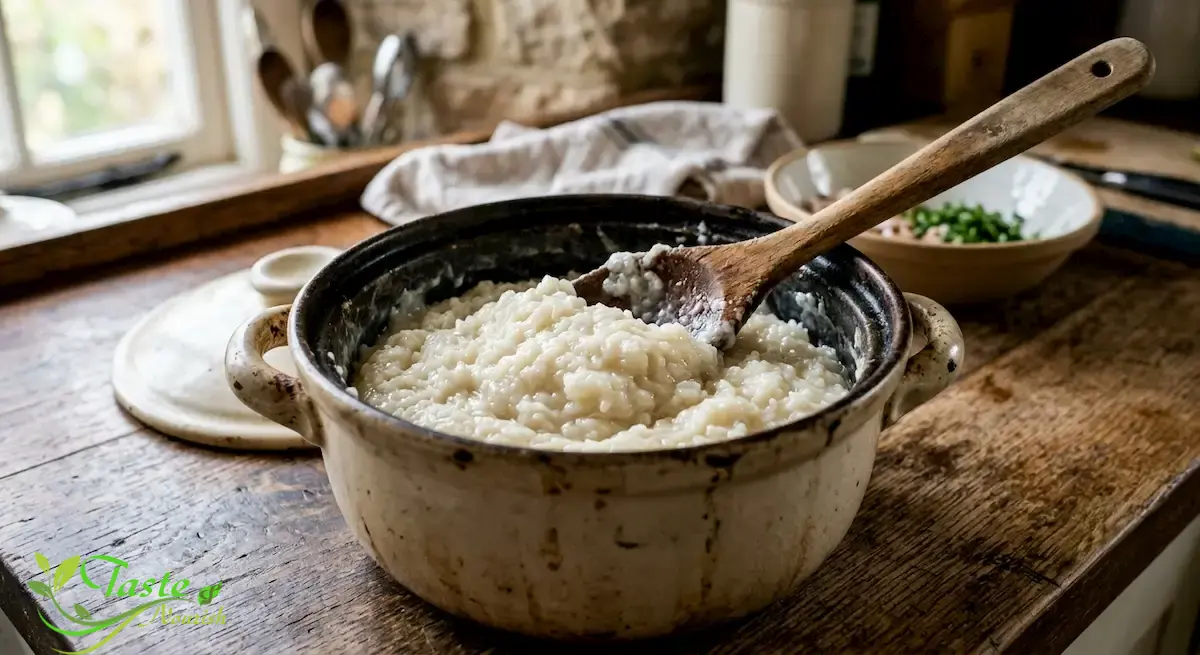
Add your rinsed and drained rice to the saucepan along with the correct amount of water from the chart above, plus a generous pinch of salt, and oil. Bring the mixture to a boil over medium-high heat, uncovered, watching closely rather than walking away. The moment it reaches a rolling boil, give it one gentle stir to prevent sticking, and don’t stir again after this point — repeated stirring releases starch and pushes your rice toward mushy territory.
Step 3 — Simmer, Rest, and Fluff
Reduce the heat to low, cover the pot with that tight-fitting lid, and let it simmer undisturbed for the time listed for your variety. Resist the urge to peek — every time you lift the lid, steam escapes and the internal timing gets thrown off. Once the timer goes off, pull the pot off the heat and let it rest, still covered, for 10 minutes; this resting period lets residual steam finish the job evenly. Finally, remove the lid and fluff the rice gently with a fork, separating the grains without mashing them.
How to Cook Rice in a Rice Cooker
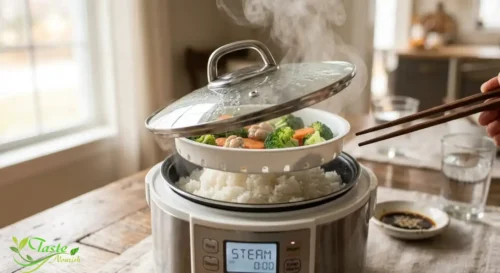
Rice cookers exist specifically to remove the guesswork from this whole process, and they’re remarkably good at it. Add your rinsed rice to the inner pot along with water at roughly a 1:1 ratio for most white rice varieties, since the sealed environment traps nearly all the steam that would otherwise escape on the stovetop. Close the lid, press start, and let the machine’s built-in thermostat do the rest — it will automatically switch to “keep warm” the moment the water is fully absorbed and the internal temperature spikes above boiling.
The only extra step worth taking is letting the rice rest, covered, for about 10 minutes after the cooker switches off, which noticeably improves the texture before you fluff and serve.
How to Cook Rice in an Instant Pot or Pressure Cooker
Pressure cooking is the fastest reliable method, and it’s especially forgiving for brown rice, which otherwise takes the longest of any common variety. Because a sealed pressure cooker loses almost no moisture to evaporation, you’ll want noticeably less water than the stovetop chart calls for — often 10 to 25 percent less, depending on your specific model.
For white rice, a roughly 1:1 ratio under high pressure for 3 to 4 minutes typically works well, while brown rice benefits from around 1:1.25 and 20 to 22 minutes at high pressure.
Always allow a natural pressure release of at least 10 minutes rather than a quick release, since this extra time lets the grains finish absorbing moisture evenly instead of turning gummy from a sudden pressure drop.
Common Rice-Cooking Mistakes (and How to Fix Them)
Almost every rice disaster traces back to one of a handful of repeat offenders, and recognizing the pattern makes it much easier to troubleshoot in real time.
Problem
Likely Cause
Fix
Mushy, gummy texture
Too much water, or skipped rinsing
Rinse until water runs clear; reduce water slightly next batch
Crunchy or hard center
Not enough water, or lid removed too early
Add a splash of hot water, re-cover, and simmer a few more minutes
Burnt bottom layer
Heat too high, or thin-bottomed pot
Use low heat and a heavy-bottomed pot; avoid stirring during simmering
Sticky, clumped grains
Excess surface starch or stirring during cooking
Rinse thoroughly; don’t stir once it’s simmering
Inconsistent doneness
Uneven heat distribution or lid not sealed
Use a tight-fitting lid; distribute rice in an even layer before cooking
Most of these issues share the same root fix: measure precisely, rinse consistently, and leave the pot alone once it’s simmering.
Storage, Reheating, and Food Safety
Rice carries a food safety consideration that’s a little different from most leftovers, so it’s worth understanding rather than skipping over. Bacteria grow most rapidly between 40°F and 140°F, a range often called the “danger zone,” and can double in number in as little as 20 minutes within that window. Cooked rice sitting out on the counter falls squarely into that danger zone, and rice specifically can carry spores of Bacillus cereus that survive normal cooking temperatures, then multiply if the rice cools too slowly.
For this reason, leftovers should be placed into shallow containers for faster, more even cooling and refrigerated at 40°F or below within two hours of cooking — or within one hour if the room is especially warm.
When it’s time to reheat, bring the rice back up to a proper internal temperature rather than just warming it through. Foods should be reheated thoroughly to an internal temperature of 165°F, or until hot and steaming throughout, and a microwave should be covered and rotated partway through to eliminate cold spots. Properly stored cooked rice generally holds up well in the refrigerator for a few days and considerably longer in the freezer, though texture may soften somewhat after thawing.
♦ If leftover rice smells off, looks slimy, or has simply been sitting out for hours at a party or potluck, it’s not worth the risk — when in doubt, throw it out.
Nutrition, Health Considerations, and Common Myths
Rice is a genuinely useful staple for a lot of reasons beyond convenience: it’s naturally gluten-free, budget-friendly, and pairs with virtually any cuisine on earth. That said, not all rice offers the same nutritional profile, and a few persistent myths deserve a closer look.
Brown vs. White: Which Is Actually Healthier?
A cup of cooked medium-grain white rice contains about 242 calories, and brown rice — which has more nutrients, more fiber, and a lower glycemic index value — is generally the healthier choice for most people. That said, health isn’t purely about the grain in isolation.
For people experiencing a flare-up of a digestive condition that makes fiber harder to tolerate, white rice may actually be the gentler, more appropriate option, at least until symptoms settle down. Research following large groups of people has found an association between higher intakes of white rice and greater risk of developing type 2 diabetes, a pattern seen most strongly in Asian populations, with a smaller, less clear signal in Western populations.
None of this means white rice is “bad” — it means the healthier default, when you have a choice, tends to lean toward brown or other whole-grain varieties, which is consistent with USDA MyPlate guidance recommending that at least half of the grains in your diet come from whole grain sources.
What About Arsenic in Rice?
This one gets exaggerated online, but it’s rooted in a real, well-studied concern. Rice plants tend to absorb naturally occurring arsenic from soil and water more readily than most other crops, which is why food safety agencies pay particular attention to it.
Cooking rice in excess water — essentially boiling it like pasta and then draining off the extra liquid — has been shown to reduce both the arsenic content and the enriched vitamin content of the cooked grain. In practice, that means a simple, low-effort swap: if arsenic exposure is a concern for you (particularly for infants and young children, where rice cereal is a common early food), rinsing rice thoroughly before cooking and occasionally using the excess-water method can meaningfully lower exposure, at the modest cost of losing a bit of the added nutrients.
For most adults eating a varied diet, this isn’t a reason to avoid rice altogether — it’s simply a reason to diversify your grains rather than relying on rice for every single meal.
Substitutions and Tasty Variations
Once the base technique clicks, rice becomes a genuinely flexible canvas rather than a fixed recipe. Swapping plain water for low-sodium chicken, vegetable, or bone broth adds a meaningful layer of flavor using the exact same ratios you’d use for water — just be mindful that store-bought broths can be salty, so taste before adding extra salt on top.
Toasting the raw rice briefly in a little oil or butter before adding liquid (the technique behind a classic pilaf) develops a nuttier, more complex flavor and helps the grains stay distinct rather than clumping. For a simple weeknight upgrade, stir in aromatics like sautéed onion, garlic, or a bay leaf during the simmer stage, then finish with fresh herbs, a squeeze of citrus, or toasted nuts right before serving.
♦ If you’re cooking for someone avoiding grains altogether, cauliflower rice is the most common substitute, though it requires an entirely different cooking approach — a quick sauté rather than a simmer — since it doesn’t absorb water the way true rice does.
Conclusion
Cooking great rice really does come down to a short list of fundamentals: the right ratio for your specific variety and appliance, a rinse to control starch, a tight seal to manage evaporation, and a resting period before you ever lift the lid. Once those pieces are in place, the rest is just repetition — your instincts will start telling you when a pot needs another splash of water or five more minutes on low heat. Whether you’re feeding a single bowl of jasmine rice under a stir-fry or a big pot of brown rice for meal prep, the same core principles carry you through every single time.
Cook Rice FAQs
Q1. Do I really need to rinse rice before cooking?
For most varieties, yes — rinsing removes excess surface starch that otherwise makes the finished rice gummy rather than fluffy. The main exception is enriched white rice, where rinsing can wash away some of the vitamins sprayed onto the grain’s surface, so it’s worth checking your specific package.
Q2. Why does my rice cooker boil over sometimes?
This is almost always caused by excess surface starch foaming up as the water heats. Rinsing the rice thoroughly before adding it to the cooker usually solves the problem completely.
Q3. Can I cook rice without measuring, like pasta?
Yes — this “pasta method” works well for brown rice or wild rice, where cook times vary and precision is harder to nail down. Boil the rice in a large, unmeasured pot of water until tender, then drain it through a fine-mesh strainer just like pasta.
Q4. Is it safe to reheat rice more than once?
It’s best to only reheat rice one time. Repeated cooling and reheating gives any surviving bacteria multiple opportunities to multiply, increasing the risk of foodborne illness even if the rice looks and smells fine.
Q5. Does older rice really need more water?
Yes — rice loses moisture in storage over time, and drier, older grains absorb water more slowly and often need slightly more liquid than a fresh bag to cook through evenly.
Hanan Abo Samra is the founder of Taste & Nourish, sharing trustworthy nutrition guidance and recipes drawn from 20+ years of hands-on cooking experience. When she's not developing new recipes, Hanan is researching the science behind everyday ingredients to bring readers practical, evidence-based guidance for a healthier lifestyle.