
Filo Pastry Cups (Phyllo Cups) | The Ultimate Guide to Recipes, Tips & Fillings
Filo Pastry Cups (Phyllo Cups) | The Ultimate Guide to Recipes, Fillings & Expert Tips
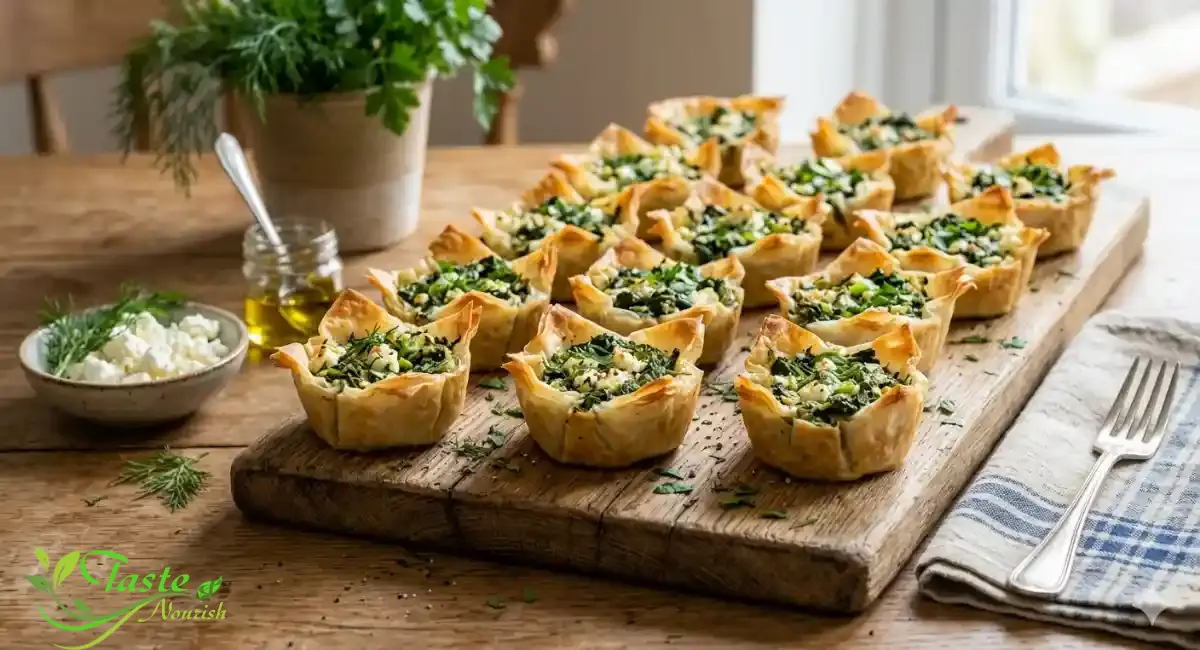
Filo Pastry Cups (Phyllo Cups)
If you’ve ever placed a tray of tiny, golden filo pastry cups on a party table and watched them vanish within minutes, you already understand their superpower. Phyllo cups — also called phyllo shells, filo cups, or fillo cups — are arguably the most versatile, crowd-pleasing, and underrated tool in any home cook’s entertaining arsenal. They look like they belong on a catering display at a five-star hotel, yet they take under 15 minutes to prepare, require almost no special equipment, and can be filled with virtually anything your imagination conjures up — from garlicky spinach-and-feta to silky blueberry cheesecake cream.
But despite their growing popularity, most people are only scratching the surface of what phyllo cups recipes can actually deliver. Do you know the one moisture-blocking trick that keeps your cups crispy for hours after filling? Or the key difference between baking your filling inside a raw cup versus a pre-baked one? Or which homemade layering method produces the most structurally sound, restaurant-quality result? This comprehensive guide answers all of that and more.
In the sections below, you’ll find everything from the ancient Ottoman history of filo pastry to a step-by-step tutorial for crafting homemade phyllo cups, a curated lineup of the best savory and sweet filo pastry cups recipes, expert storage advice, and a full filling comparison table to help you plan your next gathering. Whether you’re a complete beginner who’s never opened a box of phyllo dough or a seasoned entertainer looking to expand your recipe repertoire, this is the only guide you’ll need.
What Are Filo Pastry Cups (Phyllo Cups)?
Filo pastry cups, also written as phyllo cups or phyllo shells, are small, cup-shaped pastry shells made from multiple thin, buttered layers of filo (phyllo) dough that are baked until golden and crispy. Think of them as the edible equivalent of a tiny, perfectly engineered bowl — one that’s light enough to shatter satisfyingly when you bite into it, yet sturdy enough to hold a generous spoonful of filling without collapsing.
These crispy crunchy pastry bites are perfect for formal dinners, laidback lunches, buffet events, or just a little snack, and the beauty is they can be eaten warm or cold with both sweet and savory fillings. They are genuinely one of the most versatile items you can have in your culinary arsenal — the blank canvas that works equally well as an elegant cocktail party appetizer or a fun weeknight dessert.
The structure of a phyllo cup is what makes it special. The cups are made from very thin sheets of dough layered together to create a thicker yet still light and airy shell. Each layer is brushed with melted butter or oil before the next sheet is placed on top, and the whole stack is then pressed into a muffin tin and baked.
The result is a flaky, multi-layered cup with a satisfying crunch that holds its shape remarkably well — at least for a reasonable amount of time after filling. Understanding what goes into making these cups helps you appreciate why they behave the way they do, and why certain tricks (like filling them right before serving) can make a big difference in the final result.
Filo vs. Phyllo vs. Puff Pastry — What’s the Difference?
One of the first things people get confused about is the naming. Are “filo” and “phyllo” the same thing? Absolutely yes — they’re simply different transliterations of the same Greek word. “Filo” is common in English-speaking countries, “Phyllo” is the Greek transliteration widely used in cookbooks, and “Fillo” or “Yufka” are regional names in Turkish and Balkan cuisines.
So you can use either spelling interchangeably when searching for recipes or shopping at the grocery store — they refer to exactly the same product. The confusion compounds when people start comparing filo to puff pastry, since both result in flaky, layered baked goods.
Here’s the critical distinction you need to understand: unlike puff pastry, filo doesn’t contain layers of butter folded into the dough; instead, the thin sheets are stacked and brushed with oil or melted butter during assembly to create a crisp, flaky texture. Puff pastry rises dramatically in the oven because of the steam created by its high butter content, producing a thick, puffy, and rich result.
Filo, by contrast, stays thin and becomes incredibly crispy rather than puffy. Phyllo dough is made with little to no fat — the main ingredients are flour, vinegar, oil, and cornstarch. This lean composition is also what makes phyllo a healthier choice by default, since you control exactly how much butter or oil you add between the layers.

Store-Bought vs. Homemade Phyllo Cups — Which Should You Choose?
Store-Bought Phyllo Cups: The Convenient Route
Let’s be honest: for most people, most of the time, store-bought phyllo cups are the way to go. They save an enormous amount of time, they’re consistent in size and shape, and they’re available in almost any major grocery store. You can find them not refrigerated — just sitting in a basket in the aisle. They’re ready to go. All you need to do is fill them.
According to the directions, you can bake them for a few minutes to crisp them up or fill them and bake them as well, with each action taking under 10 minutes. For someone who’s planning a party and managing a dozen other things at once, that convenience is genuinely priceless. Popular brands like Athens are widely trusted, with each box typically containing 15 pre-formed cups that are uniformly sized and surprisingly durable during transport. Appetite for Life
The only real downsides to store-bought cups are that you get a fixed, mini size (ideal for two-bite appetizers but not larger canapés), and they cost a bit more per cup compared to making your own from scratch. That said, for most everyday entertaining scenarios, the trade-off is entirely worth it. You can find them in the frozen section of pretty much any grocery store. If you’re feeding a large crowd, simply multiply the boxes — the math is easy, the execution is fast, and the results are reliably delicious.
How to Make Homemade Phyllo Cups from Scratch
Making your own homemade phyllo cups is a genuinely rewarding experience, especially when you can’t find pre-made shells at your local store or when you want to customize the size of your cups. The process is simpler than it sounds once you understand the key principles — keep the dough moist, be liberal with butter, and work quickly. The key to making phyllo cups is to be liberal with the butter; otherwise, the phyllo will be dry and pasty.
Spread melted butter on each sheet before stacking them on top of each other. This isn’t the place to skimp on your dairy — the butter is doing double duty here, acting as glue between the layers and as the fat that transforms during baking into that gorgeous golden crunch.
There are approximately 40 sheets per 1 pound package, with about 20 sheets per 8-ounce roll, and the sheets are roughly 9 inches by 14 inches. Knowing these dimensions helps you plan your cuts efficiently and minimize waste.
Whether you’re making circles or squares, you can reliably get 12 cups per stack of 6 layers. And if you do cut circles and have scraps left over — don’t throw them away. You can bake them just like the pastry shells and have a pile of crunchy, buttery filo flakes that make great toppings — beautiful and delicious on top of ice cream, yogurt, pies, frosted cakes, or even baked custard. Nothing in your phyllo dough pack needs to go to waste.
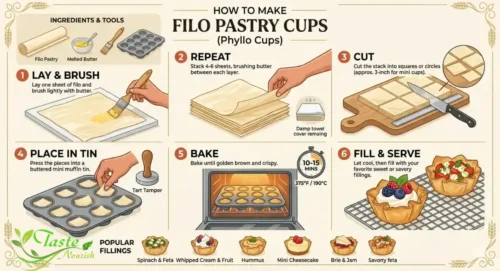
Step-by-Step Guide to Making Phyllo Cups at Home
Ingredients & Tools You’ll Need
Before you start, getting organized is half the battle. The beauty of homemade phyllo cups is that the ingredient list is refreshingly short. You need store-bought phyllo dough (thawed overnight in the refrigerator), unsalted butter (melted), a pastry brush, a pizza cutter or sharp knife, and a standard or mini muffin tin depending on the size you want. Preheat your oven to 375 degrees and spray a mini muffin tin with cooking spray.
You’ll also want to set up a damp towel system for keeping your dough moist as you work — this step is non-negotiable if you want to avoid crumbling, tearing disasters. The easiest way is to take a clean towel, saturate it with water, wring it out completely, and lay it over the unrolled filo sheets. Keep everything covered except the single sheet you’re actively working with at any given moment.
The Two Key Methods for Shaping the Cups
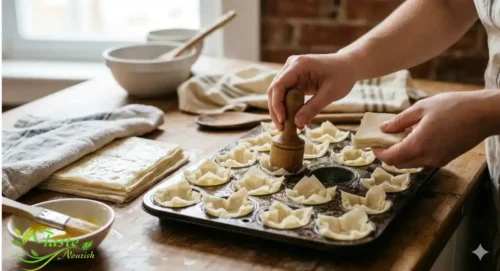
Once you have your butter, dough, and muffin tin ready, there are two popular approaches to shaping the cups, and both produce excellent results depending on your preference. The first method is to take the first sheet, brush it with butter, and place it into the muffin tin, then brush the other sheet and place it over the first, repeating with the remaining two phyllo sheets to get a small basket.
The second method involves stacking and buttering all layers flat first, then cutting into squares and pressing those squares into the tin — this gives you a neater, more uniform cup with cleanly layered walls. After stacking and buttering the layers, cut into 12 squares, then nestle them into the muffin tins and bake for 10 minutes until golden brown. Either method works beautifully; the first creates a more rustic, free-form look, while the second is cleaner and more restaurant-like in presentation.
Expert Tips for Perfect Phyllo Cups Every Time
Getting truly perfect phyllo cups — ones that stay crispy, hold their filling gracefully, and look as gorgeous as they taste — comes down to a handful of expert tricks that most recipes don’t spell out clearly enough. Understanding these principles will elevate your results from “pretty good” to “people-are-asking-for-your-recipe” territory, and they apply whether you’re using store-bought shells or making your own from scratch.
Moisture is your biggest enemy. The crispiness of a phyllo cup is entirely dependent on keeping moisture away from the pastry walls. Do not fill the cups too early before serving — a good guide is to fill them at most 2 hours before eating. Baking your store-bought phyllo cups a bit more will help them crisp up further, and consider placing a barrier like a lettuce leaf between the phyllo shell and the filling to keep the moisture at a minimum.
This lettuce-leaf trick is a genuine game-changer for wet fillings like hummus or yogurt-based dips. If you’re serving a particularly moist filling like guacamole or a cream-based dip, that thin layer of lettuce buys you precious extra time before the cup starts to soften. Similarly, if you’re freezing phyllo cups, don’t thaw them before reheating — put them directly in the oven, as thawing will make them soggy.
Temperature management matters too. Cold or room-temperature fillings can be spooned into pre-baked cups just before serving, but if you’re using hot fillings that need to bake inside the cups, there’s a strategic choice to make.
Empty cups are cooked in the oven for about 7 to 8 minutes. If you plan to add a filling that needs to be baked, it’s better not to pre-bake the cups — put the filling in the unbaked cups and then put them in the oven for around 10 minutes, checking regularly to make sure they don’t burn. This approach lets the pastry and filling bake together, preventing the double-baking scenario that can overcook the delicate dough. For cold fillings, always pre-bake the cups to full golden crispness and let them cool completely before filling.
The Best Savory Phyllo Cups Recipes
Spinach and Feta Phyllo Cups (Spanakopita Bites)
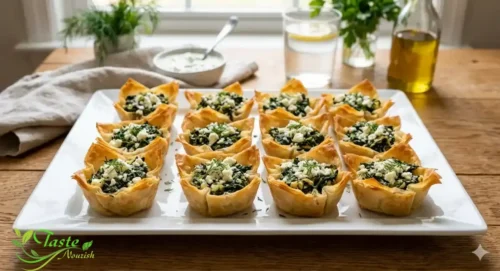
If there’s one savory phyllo cup recipe that has proven itself as a universally beloved crowd-pleaser across every type of gathering, it’s the spanakopita-inspired spinach and feta bite. These mini parmesan spinach phyllo cup appetizers make entertaining easy — crisp phyllo cups filled with Parmesan spinach dip, bell peppers, artichoke hearts, and Parmesan cheese.
The combination of earthy spinach, salty feta, and aromatic herbs against that shattering phyllo shell is nothing short of transcendent. To make these, sauté fresh or frozen spinach with garlic until all the moisture has evaporated — this step is critical, because wet spinach will soften your cups almost immediately.
Combine the cooked spinach with crumbled feta, cream cheese (for binding and richness), a pinch of nutmeg, salt, and black pepper. Spoon the mixture into pre-baked or raw cups and bake at 375°F for about 10–12 minutes until the filling is set and the pastry is deeply golden. A squeeze of lemon juice over the finished bites adds brightness that cuts right through the richness.
Sundried Tomato and Feta Filo Cups
These filo cups bring a Mediterranean flair that feels instantly sophisticated. Spoon the sundried tomato and feta mixture into each cup, then transfer to the oven and bake for about 10 minutes until the pastry looks golden and glorious. Remove the filo cups from the muffin pan, transfer to a serving plate, drizzle more honey over the cups, and finish with a scattering of thyme.
The honey in this recipe is not optional decoration — it plays a genuinely functional role, cutting through the rich savoriness of the sundried tomatoes and feta. You can even substitute hot honey (honey mixed with chili flakes and a squeeze of lemon) for an extra layer of complexity that adventurous eaters will absolutely love.
You can assemble these cups up to two days ahead of time, then just store them covered in the fridge — a huge advantage for party prep. Just hold off on the honey drizzle and fresh thyme until the moment you’re ready to serve.
Mini Phyllo Quiche Cups
Mini quiches baked directly inside phyllo shells combine two beloved party foods into one elegant, show-stopping bite. The technique here is to whisk together eggs, a splash of heavy cream, shredded cheese (gruyère, cheddar, or smoked gouda all work beautifully), and your choice of mix-ins — diced ham, crispy bacon, sautéed mushrooms, roasted peppers, or fresh herbs.
Pour the egg mixture directly into unbaked phyllo cups set in a mini muffin tin, filling each one about three-quarters full to leave room for the custard to puff slightly as it bakes. Bake at 350°F for 18–22 minutes, until the egg is fully set and the phyllo edges are deep golden brown. The phyllo shell serves as a structural and textural contrast to the soft, custardy filling — the combination of crispy exterior and silky interior is genuinely addictive.
These reheat beautifully the next day, making them a fantastic make-ahead option for brunch spreads or weekday snacking.
The Best Sweet Phyllo Cups Recipes
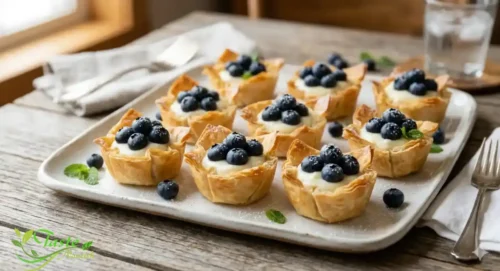
Mini Blueberry Cheesecake Phyllo Cups
Sweet phyllo cups recipes are where the versatility of this pastry really shines, and mini cheesecake cups are perhaps the most impressive-looking result for the least amount of effort. Made with store-bought phyllo pastry shells, mini blueberry cheesecakes will quickly become your new go-to entertaining dessert — they are simple to put together and look like a professional baker created them.
To make the filling, beat softened cream cheese with powdered sugar, a splash of vanilla extract, and a spoonful of sour cream until completely smooth. Pipe or spoon this mixture generously into pre-baked phyllo shells, then top with fresh blueberries and a drizzle of blueberry jam thinned with a little warm water for shine.
You can swap the blueberries for any berry — raspberries, strawberries, or blackberries — or even top them with lemon curd for a tangier variation. These cups stay surprisingly intact in the fridge for several hours, making them one of the most practical dessert options for a large gathering.
Baklava Phyllo Cups
Why make a whole tray of baklava when you can serve individual, portion-perfect cups that are just as delicious but infinitely easier to serve at a party? These mini phyllo baklava cups are flaky, sweet, and delicious — great for a party or celebration, and essentially a mini version of a popular Middle Eastern dessert. To make the filling, finely chop a mixture of walnuts and pistachios, then toss with cinnamon, a pinch of cloves, and a tiny bit of sugar.
Fill pre-baked phyllo cups with the nut mixture, then drizzle generously with warm honey syrup (made by simmering honey, water, a cinnamon stick, and a strip of lemon peel for five minutes). The syrup soaks into the nut filling and the bottom of the cup, creating a gloriously sticky, aromatic bite that captures everything wonderful about traditional baklava in miniature form. These are best served the same day they’re filled, as the honey will gradually soften the pastry over time.
Yogurt and Fresh Fruit Phyllo Dessert Cups
For a lighter, fresher alternative to heavy cream-based desserts, yogurt and fruit phyllo cups are the answer — and they’re strikingly beautiful on a dessert table. Mix yogurt, powdered sugar, and vanilla essence, keep aside in the refrigerator, then fill the baked phyllo cups with the yogurt mixture and top with fruits and nuts.
Greek yogurt is the ideal choice here because its thick, creamy texture doesn’t release moisture the way regular yogurt does, which helps preserve the crispiness of your cups for much longer. The phyllo cups were still crispy and didn’t get soggy even when filled with the yogurt mixture for 3 to 4 hours in the refrigerator — a remarkable quality that makes these genuinely party-friendly.
Top with any combination of fresh fruit (kiwi, mango, berries, and pomegranate seeds are all stunning options), a sprinkle of toasted coconut, a drizzle of honey, or even crushed pistachios for crunch and color.
Phyllo Cups Filling Ideas at a Glance
Here’s a quick comparison of the most popular filling options to help you choose the perfect combination for your occasion:
| Filling | Type | Bake with Filling? | Best For | Prep Time |
|---|---|---|---|---|
| Spinach & Feta | Savory | Yes | Parties, brunches | 15 min |
| Sundried Tomato & Feta | Savory | Yes | Cocktail hours | 10 min |
| Brie & Pepper Jelly | Savory-Sweet | Yes | Holiday gatherings | 5 min |
| Mini Quiche (Egg & Cheese) | Savory | Yes | Brunch, lunch boxes | 25 min |
| Hummus & Roasted Pepper | Savory | No | Quick appetizers | 5 min |
| Pimento Cheese & Bacon | Savory | No | Game day | 5 min |
| Blueberry Cheesecake | Sweet | No | Dessert tables | 15 min |
| Baklava (Nut & Honey) | Sweet | No | Mediterranean menus | 20 min |
| Yogurt & Fresh Fruit | Sweet | No | Summer parties | 10 min |
| Cannoli Cream | Sweet | No | Italian-themed events | 10 min |
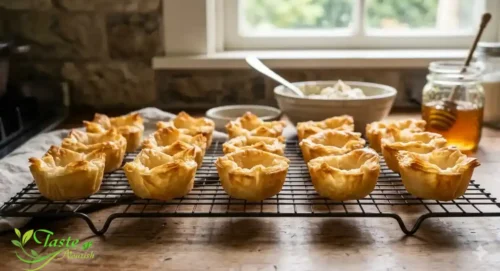
How to Store Phyllo Cups and Keep Them Crispy
Proper storage is the difference between having crispy, perfect phyllo cups available whenever you need them and ending up with a sad, soggy mess. The rules are straightforward once you understand why moisture is such a threat to this pastry, and following them will save you from a lot of last-minute stress before a big event. Whether you’ve baked your cups from scratch or simply opened a store-bought box, the storage fundamentals are the same.
For pre-baked empty cups, let them cool completely to room temperature before storing — any trapped steam will condense into moisture that softens the pastry from within. Carefully place them in an airtight container and keep in the fridge for up to 3 days.
Baked phyllo cups can also be stored in an airtight container in the freezer for up to a month, and can be easily reheated in the oven when ready to use. The tricky part of making cups in advance is ensuring there’s no moisture — store them in an airtight container, especially if you live in a humid place. A 5-minute blast in a 350°F oven will restore their original crispiness beautifully before you fill and serve them. For uncooked phyllo dough that you haven’t used up, just roll it back up, place in a zip-top bag, and refrigerate for up to 1 week.
A Brief History of Filo Pastry
From Ottoman Kitchens to Modern Party Tables
The story of filo pastry is one of the most fascinating in all of culinary history, stretching back centuries across multiple civilizations and continents. The origin of filo is generally attributed to the Turkic peoples of Central Asia, who developed traditions of thin, layered flatbreads called yufka during the medieval period to suit their nomadic lifestyle, while its paper-thin form is likely to have evolved later in the palace kitchens of Ottoman Istanbul. The very name gives away its cultural roots — filo stems from the Greek word for “leaf,” a particularly apt name for this thin and flaky pastry.
The idea of something as delicate as a leaf being edible and stackable is exactly what drew both home cooks and palace chefs to perfect its craft across generations.
The wafer-thin pastry we have come to know as filo was subsequently developed in the royal Ottoman kitchens of the Topkapi Palace in Istanbul. In fact, filo pastry became so entrenched in Turkish high society that up until the outbreak of the First World War, all upper-class Istanbul kitchens employed two filo makers — one solely dedicated to making the thinner filo required for baklava and another specifically for the preparation of the stronger filo pastry for börek. That level of specialization tells you everything about just how seriously this pastry was taken.
It wasn’t merely an ingredient — it was an art form passed down through generations of skilled craftspeople. Today, beginning in the 1960s, Greek immigrants began to popularize hand-made filo in parts of the United States, and since the invention of mechanical stretching machines, this once-laborious pastry has become accessible to home cooks worldwide.
Conclusion
Filo pastry cups — or phyllo cups as they’re equally well known — are one of those rare culinary tools that manage to be simultaneously impressive-looking and genuinely easy to work with. Whether you’re reaching for a box of store-bought shells for a quick, last-minute appetizer or spending a relaxed afternoon crafting your own from layered, butter-brushed sheets of dough, the end result is a vehicle for creativity that can go in almost any direction you choose.
From the ancient nomadic kitchens of Central Asia where thin-layered doughs were first conceived, to the elaborate pastry workshops of Ottoman Istanbul, to the modern grocery store freezer aisle, filo pastry has traveled an extraordinary journey — and the phyllo cup represents perhaps its most playful, democratic, and universally appealing form.
The recipes and techniques covered in this guide give you everything you need to start experimenting with confidence. Master the moisture-control tips, be generous with your butter, fill your cups at the right moment, and the rest is creativity. Whether you go savory with spinach and feta, elegant with sundried tomato and honey, or sweet with blueberry cheesecake and fresh fruit, one thing is guaranteed: those little golden cups will be the first thing to disappear from any table you set them on.
FAQs
1. Can I make phyllo cups ahead of time for a party?
Absolutely — and this is one of their biggest advantages as a party food. You can bake empty phyllo cups a day or two in advance, store them in an airtight container at room temperature or in the fridge, and refresh them with a few minutes in a hot oven right before filling. Just avoid filling them too early; as a general rule, fill savory cups no more than 2 hours before serving and sweet cups (especially with moist fillings) ideally within 1–2 hours.
2. What is the difference between filo pastry and puff pastry?
The key difference lies in fat content and texture. Puff pastry is laminated with large amounts of butter folded directly into the dough, producing a thick, puffy, rich result when baked. Filo (phyllo) pastry contains very little fat in the dough itself — the butter or oil is applied between the thin layers during assembly. The result is much crispier, lighter, and more delicate than puff pastry. They are not interchangeable in most recipes.
3. Are phyllo cups gluten-free?
Standard phyllo cups are not gluten-free. They are simply very thin layers of wheat-based phyllo pastry, and phyllo depends on gluten to make it so thin. However, gluten-free versions made with rice flour or corn flour alternatives do exist, and some specialty stores carry gluten-free phyllo dough that can be shaped into cups using the same homemade method.
4. How do I prevent my phyllo cups from getting soggy?
The two best strategies are: first, never fill your cups more than 2 hours before serving; and second, for particularly wet fillings, place a thin barrier (like a small leaf of butter lettuce or a spread of cream cheese) between the filling and the cup wall to block direct moisture contact. Always pre-bake empty cups to maximum crispness and let them cool completely before adding any cold filling.
5. What are the most popular brands of store-bought phyllo cups?
Athens is the most widely recognized and available brand in the United States, typically sold in the freezer section with 15 cups per box. Fillo Factory is another well-regarded brand, particularly popular among those seeking organic options. Both are widely available at major grocery chains and work excellently for both baked and no-bake fillings.