
How Long to Boil Eggs | The Complete Guide to Perfect Soft, Medium & Hard-Boiled Eggs
How Long to Boil Eggs: Complete Timing Guide for Soft, Medium & Hard-Boiled Eggs
How Long to Boil Eggs
There’s a reason people dedicate entire blog posts and kitchen experiments to the humble boiled egg. What looks like the simplest cooking task in the world is actually a surprisingly precise science. Boiling eggs for the wrong amount of time — even by just one or two minutes — can mean the difference between a silky, jammy yolk and a chalky, greenish, rubbery disaster. If you’ve ever cracked open a hard-boiled egg and found that dreaded dark ring around the yolk, you already know exactly what we’re talking about. That green-grey ring isn’t dangerous to eat, but it’s a telltale sign of overcooking, and it tends to ruin both the texture and the flavor.
Why Getting the Timing Right Actually Matters
The boiling time for eggs directly shapes the texture and taste, impacting both the white and yolk. Too short a boil leaves whites slightly runny and yolks too loose, while overboiling creates dry yolks and rubbery whites. That sweet spot in between — where the whites are fully set, firm, and tender, and the yolk is exactly at your preferred level of doneness — is what every cook is chasing.
Whether you’re making soft-boiled eggs to rest on a ramen bowl, jammy eggs for avocado toast, or a dozen hard-boiled eggs for a deviled egg platter, understanding exactly how long to boil eggs is the foundational skill that unlocks all of it.
The good news? Once you’ve got the timing chart committed to memory (or bookmarked on your phone), you’ll never ruin a boiled egg again. This guide covers every level of doneness, both major cooking methods, tips for easy peeling, and the nutritional breakdown that makes boiled eggs one of the most complete protein sources you can eat.
The Two Main Methods for Boiling Eggs
Before we even talk about timing, it’s worth clarifying that there are two widely used techniques for boiling eggs, and the timing is not interchangeable between them. Mixing up methods is one of the most common reasons people end up with inconsistent results. Think of it like driving two different cars at the same speed — the journey looks the same, but the mechanics underneath are completely different.
The Boiling Water Start Method
The boiling water start method involves lowering cold eggs gently into already-boiling water and cooking uncovered to your desired doneness. This method yields the most consistent cook times and makes the eggs significantly easier to peel. The reason it’s so reliable comes down to predictability — when the water is already at 100°C (212°F) before the eggs go in, you eliminate the variable of “how long did it take to come to a boil?” That variability is actually one of the biggest culprits behind inconsistent boiled eggs.
Starting from boiling water means your timer starts in the same conditions every single time, regardless of your stove type or the starting temperature of your water.
⇒ There’s another major perk to this method that almost no one talks about enough: easy peeling. Cold eggs dropped into boiling water experience a rapid change in temperature that causes the inner membrane to contract slightly away from the shell. Starting with boiling water makes eggs easier to peel, which is a significant advantage over the cold-water start method. If you’ve ever struggled to peel a freshly boiled egg and pulled half the white off with the shell, switching to the boiling water start method is going to feel like a revelation.
The Cold Water Start Method
The cold water start is the more traditional approach — eggs and cold water go into the pot together, the whole thing comes to a boil over high heat, then you either reduce and continue cooking or turn off the heat and let the residual warmth do the work. One big flaw with the cold-water method is that the type of pot you use significantly affects outcomes.
Aluminum, stainless steel, and cast iron are well known for their different rates of bringing water to a boil and retaining heat, which means eggs can end up cooking at different times depending on the cookware used. That’s a real problem when you’re trying to hit a specific doneness level.

That said, the cold water method isn’t without its advocates. Many cooks prefer putting eggs and cold water in a pot, bringing the water to a boil, turning off the heat, covering with a lid, and waiting 8 to 9 minutes, then using a cold bath. This approach can produce consistently well-cooked eggs that seldom crack. The key is that you need to be aware of your specific stove and pot combination and adjust accordingly. For this guide, the timings in the chart below are based on the boiling water start method, which is far more consistent across different kitchen setups.
How Long to Boil Eggs — The Complete Timing Breakdown
Here’s the part you came for. Timing ranges from 6 minutes for a runny yolk up to 12 minutes for a firm hard-boiled egg — but there’s a whole spectrum of textures in between worth knowing about. Here’s how to nail every stage.
Soft-Boiled Egg Timing
Soft-boiled eggs are the rock stars of the egg world right now — they’re everywhere on food blogs, restaurant menus, and social media feeds, and for good reason. That combination of a fully set white with a warm, flowing, golden yolk is genuinely one of the most satisfying textures in all of cooking. Getting them right requires the most precision of any boiling style because you’re working with a very narrow window.
- 4 minutes — Barely-set whites with a very runny, liquid yolk. Best served immediately in an egg cup with soldiers (strips of buttered toast).
- 5 minutes — Whites fully set, yolk still very runny and bright orange. Great for ramen bowls.
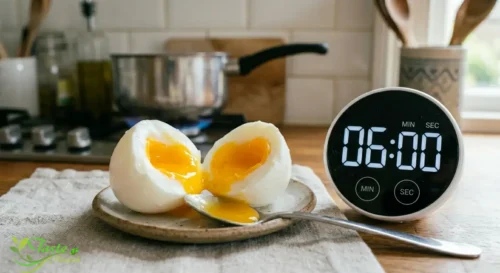
- 6 minutes — Classic soft-boiled. Whites completely firm, yolk custardy and just barely liquid in the very center.
For runny soft-boiled eggs with barely set whites, the cook time is 3 minutes. For slightly runny soft-boiled eggs, 4 minutes. For custardy yet firm soft-boiled eggs, 6 minutes. These times are based on the off-heat, covered method (cold water start). If using the boiling water start method, add approximately 1–2 minutes to each.
Medium-Boiled Egg Timing
The medium-boiled egg is criminally underrated. It sits in a gorgeous middle ground — the white is completely set and firm, and the yolk is thick, jammy, and fully opaque but not dry or crumbly. It holds together beautifully when sliced, making it perfect for salads, grain bowls, and sandwiches.
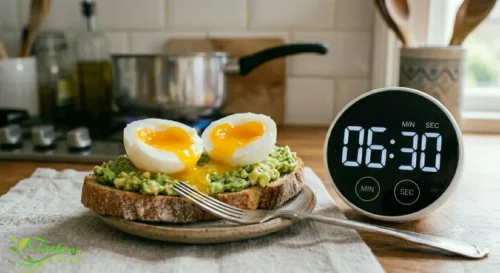
- 6.5 minutes — Soft, jammy yolk. This is what most food bloggers mean when they say “jammy egg.”
- 8 minutes — A medium yolk that’s slightly soft but firm enough to hold its shape when cut.
At 6.5 minutes, you get a soft, jammy yolk — perfect for eggs on toast or soft-boiled eggs on a salad. At 8 minutes, you get a medium yolk that’s slightly soft but firm enough to hold its own.
Hard-Boiled Egg Timing
Hard-boiled eggs are workhorses. They’re the backbone of deviled eggs, egg salad, Cobb salads, and protein-packed meal prep. The goal here is a yolk that is fully set all the way through — creamy and pale yellow, not dark or greenish.

- 10 minutes — Early stage hard-boiled. Fully set yolk with just a hint of softness in the very center.
- 12 minutes — Classic hard-boiled. Fully firm yolk, lighter in color, ideal for deviled eggs or slicing.
- 14 minutes — Very firm hard-boiled. Traditional, fully set egg with the lightest yolk, not overcooked.
At 10 minutes, you’re in the early stages of a hard-boiled egg. At 12 minutes, you get a hard-boiled egg with a lighter yolk. At 14 minutes, you get a traditional hard-boiled egg with the lightest yolk and a firm white, but not overcooked. Anything past 14–15 minutes and you start entering green-ring territory, so pull those eggs out right on time.
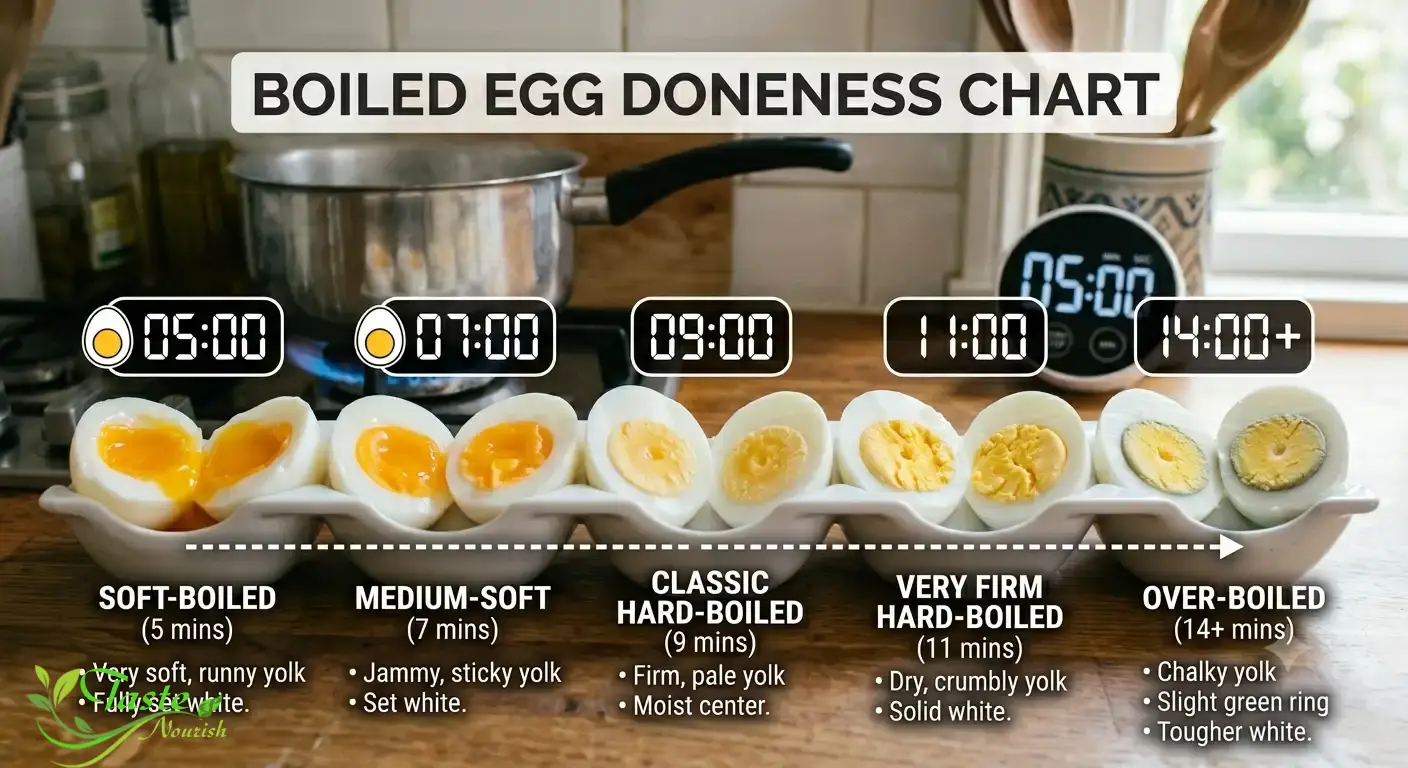
Egg Boiling Time Chart by Doneness
Here’s a comprehensive reference table using the boiling water start method (lower cold eggs into already-boiling water, start timer immediately):
| Cook Time | Yolk Texture | White Texture | Best Used For |
|---|---|---|---|
| 4 minutes | Very runny, liquid | Barely set | Egg cups, dipping toast |
| 5 minutes | Runny, flowing | Fully set | Ramen, noodle dishes |
| 6 minutes | Custardy, semi-liquid | Firm | Classic soft-boiled breakfast |
| 6.5 minutes | Jammy, thick | Firm | Toast, grain bowls, salads |
| 8 minutes | Slightly soft, firm | Firm | Salads, meal prep bowls |
| 10 minutes | Fully set, trace of softness | Firm | Slicing, snacking |
| 12 minutes | Fully firm, pale yellow | Firm | Deviled eggs, egg salad |
| 14 minutes | Very firm, very pale | Firm | Pickling, travel snacks |
📌 Key Takeaway: Every minute matters when boiling eggs. Set a timer the instant the eggs hit the water — don’t rely on guesswork.
Factors That Affect How Long to Boil Eggs
Even armed with the perfect timing chart, there are a few variables that can throw off your results if you’re not paying attention. Understanding these factors means you can adapt on the fly rather than being frustrated by inconsistent outcomes.
Egg Size and Temperature
Egg size is a bigger factor than most people realize. The timings above are calibrated for large eggs — the standard size used in most recipes worldwide. Extra-large or jumbo eggs will need an extra 1–2 minutes at each stage, while medium or small eggs should be pulled about 1 minute early. Egg temperature at the time of cooking also matters significantly.
Using fridge-cold eggs is recommended as insurance for creamy yolks, since consistently cold eggs going into boiling water produce the most reliable results. Room-temperature eggs will cook slightly faster, so if your eggs have been sitting out for an hour or more, subtract about 30–60 seconds from your target time.
The following factors affect your egg boiling time:
- Egg size — Large is the standard; adjust ±1–2 minutes for bigger or smaller eggs.
- Starting temperature — Cold eggs from the fridge cook more predictably.
- Altitude — Higher elevations mean lower boiling points and longer cook times.
- Pot material — Cast iron retains heat differently than aluminum or stainless steel.
- Number of eggs — A pot full of eggs cools the water slightly; maintain a gentle boil.
- Water volume — Eggs should be covered by at least 1 inch of water for even cooking.
Altitude and Cookware Type
At higher elevations above 6,000 feet, water boils at a lower temperature, so eggs need longer cooking times — up to 15 minutes for hard-boiled eggs at those heights. If you’re cooking in Denver, Addis Ababa, or any high-altitude city, add a few extra minutes and test your results. You may need to experiment once or twice to find your perfect timing for your specific location.
Aluminum, stainless steel, and cast iron are known for their different rates of bringing water to a boil and retaining heat. A cast iron pot that takes two minutes longer to reach a boil than an aluminum pot will also cool more slowly once removed from heat, which can inadvertently cook eggs several minutes longer. The boiling water start method largely neutralizes this variable since the water is already at temperature before the eggs go in.
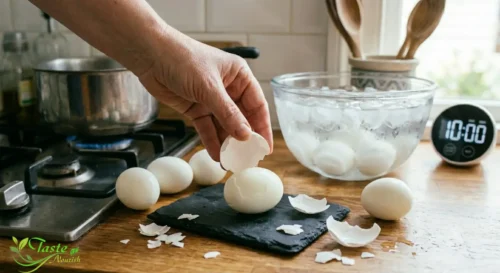
Step-by-Step: How to Boil the Perfect Egg
Ready to put all of this into practice? Here’s the exact process, step by step, that produces consistent results every time regardless of your kitchen setup.
- Fill your pot with water. Use a medium saucepan (a 3-quart pot works well for up to 8 eggs). Fill with enough water so it will sit about 1 inch above the eggs once they’re added.
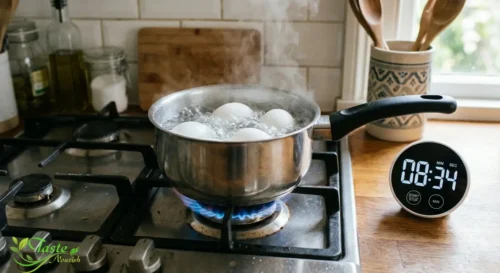
- Bring to a rolling boil. Bring the water to a full, vigorous boil over high heat with the lid off.
- Lower the eggs gently. Use a slotted spoon or skimmer to carefully lower cold eggs from the fridge directly into the boiling water. Lower them slowly to prevent cracks from thermal shock.
- Reduce to a gentle boil. After adding the eggs, adjust the heat to maintain a steady boil — not a hard, rolling boil, which can cause cracks.
- Set your timer immediately. Start counting the moment the eggs hit the water, using the timing chart above for your desired doneness.
- Prepare your ice bath. While the eggs cook, fill a large bowl with ice and cold water. You want it ready to go the instant the timer rings.
- Transfer to ice bath. Immediately transfer the eggs to ice water for 10 minutes to stop the cooking and ensure easy peeling.
- Peel or store. Peel under running cold water, or store unpeeled in the refrigerator.
💡 Reader Tip: Add a teaspoon of baking soda to the boiling water. Many home cooks swear it makes the shells slip off more easily, particularly for fresh eggs.
The Ice Bath: Why It’s Non-Negotiable
If there’s one step home cooks consistently skip, it’s the ice bath — and it’s the step that arguably matters most for both texture and peelability. When you pull eggs from boiling water, they don’t stop cooking the moment they leave the pot. The residual heat inside the egg continues cooking the whites and yolk for several minutes, which can push a perfectly timed 6-minute egg into overcooked territory before you even get to eat it. An ice bath stops that process dead in its tracks.

Here’s what the ice bath accomplishes for you:
- Stops residual cooking immediately — preventing the yolk from overcooking past your target doneness.
- Creates a steam layer between the shell and the white, which makes peeling dramatically easier.
- Firms up the white just enough to make it easy to handle without tearing.
- Cools the egg quickly so you can peel and serve or refrigerate within minutes rather than waiting.
Every minute counts when hard-boiling eggs to a specific degree of doneness. Eggs will continue to cook unless you take steps to stop them quickly. An ice bath is essential to evacuate the cooking process. The ice bath needs 10 minutes to be fully effective — a quick 30-second dip won’t do the job. Make the ice bath first, before your timer even starts, so it’s ready to go the moment the eggs need it.
How to Peel Boiled Eggs Without the Frustration
Peeling boiled eggs can feel like a lottery sometimes — some days the shells come off in satisfying large pieces, other days it feels like you’re excavating an archaeological site one tiny fragment at a time. The difference usually comes down to a combination of egg freshness, cooking method, and peeling technique.
Here’s what actually works:
- Use older eggs when possible. Fresh eggs (under 1 week old) have a tighter inner membrane that clings to the white. Eggs that are 1–2 weeks old peel far more easily.
- Don’t skip the ice bath. A full 10-minute ice bath creates separation between the shell and white.
- Tap and roll. Tap the egg on a hard surface at the rounded end, then roll it gently to crack the shell all over before peeling.
- Peel under running water. Cool running water gets under the membrane and lifts it away from the white cleanly.
- Start at the wide end. The air pocket at the wide end gives you a natural starting point to slip your thumb under the membrane.
- Add baking soda or vinegar. Adding a teaspoon of baking soda or a splash of vinegar to the boiling water can raise the pH and help the membrane release from the white more easily.
📌 Note: If an egg cracks during cooking, add a small splash of white vinegar to the water. The vinegar helps the egg white coagulate quickly around the crack, preventing it from spreading into the water.
Nutrition Facts: What’s Inside a Boiled Egg?
Boiled eggs aren’t just versatile and delicious — they’re one of the most nutritionally complete foods you can eat. Understanding what you’re getting with each egg makes it easier to appreciate why they’ve been a dietary staple for thousands of years.
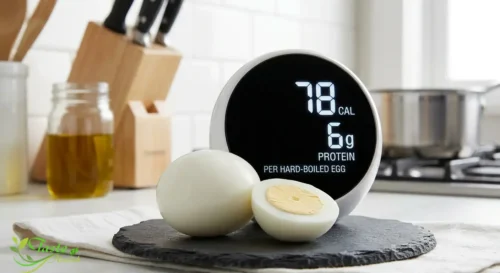
Hard-boiled eggs are low in calories and rich in many important vitamins, minerals, and nutrients. The yolk provides nutrients, fat, and protein, while the white is almost exclusively protein. Eggs contain all nine essential amino acids, making them a complete protein source.
Here’s the complete nutrition breakdown for one large hard-boiled egg (50g):
| Nutrient | Amount | % Daily Value |
|---|---|---|
| Calories | 77–78 kcal | ~4% |
| Protein | 6.3 g | 13% |
| Total Fat | 5.3 g | 7% |
| Saturated Fat | 1.6 g | 8% |
| Carbohydrates | 0.6 g | <1% |
| Cholesterol | 212 mg | 71% |
| Vitamin A | — | 6% |
| Vitamin B2 (Riboflavin) | — | 15% |
| Vitamin B12 | — | 9% |
| Vitamin D | — | ~6% |
| Selenium | 15.4 mcg | 22% |
| Phosphorus | 86 mg | 9% |
| Choline | 147 mg | 27% |
Choline is important for cellular maintenance and growth, and hard-boiled eggs are the top source of it in the United States. Choline is particularly critical during pregnancy for fetal brain development, and most people don’t get nearly enough of it from other food sources.
One common misconception is that the protein is found only in the egg white. However, almost half of an egg’s protein content comes from the yolk. Consuming the entire egg — both yolk and white — gives you the most benefit from the protein and nutrients it contains.
Here are the key health benefits of eating boiled eggs regularly:
- High-quality complete protein — All 9 essential amino acids in ideal ratios for human absorption.
- Brain health — Choline supports memory, cognitive function, and fetal brain development.
- Eye protection — Lutein and zeaxanthin are antioxidants that protect against macular degeneration.
- Weight management — Studies show up to 400 fewer calories consumed when eggs are eaten at breakfast compared to bagels of equal calories.
- Bone and muscle support — Calcium, phosphorus, vitamin D, and protein all contribute to musculoskeletal health.
- Mental health — B vitamins, tryptophan, and vitamin D in eggs are associated with improved mood and reduced risk of depression.
Common Mistakes to Avoid When Boiling Eggs
Even experienced cooks fall into some of these traps. Knowing what not to do is just as valuable as knowing the right technique.
Here are the most common egg-boiling mistakes to avoid:
- Starting the timer late. Your timer should start the second the eggs go into the water, not when the water returns to a boil.
- Using a hard, rolling boil. A vigorous boil can cause eggs to bounce around and crack; reduce heat to medium once the eggs are in to maintain a steady, gentle boil.
- Skipping the ice bath. Without it, residual heat continues cooking the egg and you lose control of your target doneness.
- Overcrowding the pot. Eggs need space to cook evenly. Keep them in a single layer with room between each egg.
- Cooking refrigerator-cold eggs in room-temperature water. If using the cold water start method, the variable of how long your stove takes to boil makes timing unreliable.
- Storing peeled eggs uncovered. Peeled eggs exposed to air in the fridge will dry out and develop an off flavor. Always store them in water or an airtight container.
📌 Pro Tip: If you’re boiling a large batch, don’t pile them all in together. Cook in batches if your pot isn’t large enough to keep them in a single layer — crowding causes uneven cooking.
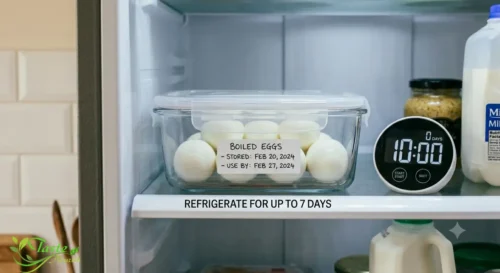
How to Store Boiled Eggs
One of the most underrated things about boiled eggs is how well they keep. They’re ideal for meal prep, batch cooking, and having a ready protein source available throughout the week.
Here’s what you need to know about storing them properly:
- Unpeeled in the refrigerator: Boiled eggs can be stored unpeeled in the refrigerator for up to a week, keeping a protein-packed snack ready whenever hunger strikes.
- Peeled in the refrigerator: Place peeled eggs in a bowl or container covered with cold water. Change the water daily. Use within 5 days.
- Never store in the fridge door: Eggs should never be stored in the refrigerator door due to frequent temperature changes. Always store them in the main part of the fridge.
- Room temperature: Boiled eggs should not be left at room temperature for more than 2 hours due to food safety concerns.
- Freezing: Whole boiled eggs don’t freeze well — the white becomes rubbery. However, hard-boiled yolks can be frozen successfully and used later in deviled eggs or egg salad.
| Storage Method | Duration | Notes |
|---|---|---|
| Unpeeled, refrigerated | Up to 7 days | Best option for freshness |
| Peeled, in water, refrigerated | Up to 5 days | Change water daily |
| Peeled, in airtight container | 3–5 days | Keep moist to prevent drying |
| Room temperature | Max 2 hours | Food safety concern beyond this |
| Frozen (yolks only) | Up to 3 months | Whites become rubbery when frozen |
Conclusion
Boiling eggs perfectly is one of those skills that sounds simple but rewards the people who actually take the time to understand it. Once you know the timing, the method, and the variables at play — egg size, water temperature, altitude, cookware — you unlock every texture from silky-runny soft-boiled to firm, fully-set hard-boiled, all on demand. The boiling water start method with an ice bath is the most reliable approach for consistent results and easy peeling, and a kitchen timer is your single most important tool. Pair that with the detailed timing chart in this guide, and you’ll never have to guess again.
Boiled eggs are also, by any measure, one of the most nutritious foods you can eat — complete protein, brain-supporting choline, eye-protecting antioxidants, and a mere 77–78 calories per egg. Whether you’re fueling a workout, prepping lunches for the week, or perfecting a ramen garnish, the humble boiled egg delivers every single time — as long as you know exactly how long to give it.
Frequently Asked Questions About How Long to Boil Eggs
Q1. How long do you boil eggs for hard-boiled?
For a fully firm, hard-boiled egg using the boiling water start method, boil for 12 minutes. This gives you a completely set yolk that is pale yellow and creamy without any green ring. Immediately transfer to an ice bath for 10 minutes to stop cooking and make peeling easier.
Q2. Can I boil eggs straight from the fridge?
Absolutely — in fact, it’s recommended. Cold eggs from the refrigerator produce more consistent and predictable results when dropped into boiling water. Just lower them carefully with a slotted spoon to prevent cracking from thermal shock.
Q3. Why does my hard-boiled egg have a green ring around the yolk?
That green-grey ring is caused by overcooking. It forms when hydrogen sulfide in the white reacts with iron in the yolk at high temperatures to create iron sulfide. It’s harmless to eat but means the egg was cooked for too long. Stick to 12–14 minutes maximum and use an ice bath to prevent it.
Q4. How do I know if a boiled egg is done without cracking it open?
The spin test works well: place the egg on a flat surface and spin it. A hard-boiled egg spins smoothly and quickly, while a raw or soft-boiled egg wobbles and spins unevenly due to the liquid interior. You can also gently shake the egg near your ear — no sloshing sound means it’s hard-boiled.
Q5. Can you reboil an undercooked boiled egg?
Yes, you can. If you crack open an egg and find it undercooked, return it to boiling water for 1–2 more minutes. This works best for eggs that are only slightly undercooked. Keep the shell on if possible — a shelled egg can be placed back in the water in a small heatproof container. The texture won’t be quite as good as a properly timed egg, but it’s far better than eating an undercooked one.