Canned chickpeas are one of the few pantry staples that can go from soft and mild to genuinely crunchy in under twenty minutes, and an air fryer is the easiest way to get there. This air fryer chickpeas recipe uses just a few ingredients and a couple of technique details that make the difference between a chewy, disappointing batch and one that actually crackles when you bite into it.
This is a snack-and-appetizer recipe, not a nutrition breakdown. You’ll find exactly what you need to prepare, cook, season, serve, and store a batch that holds its crunch.
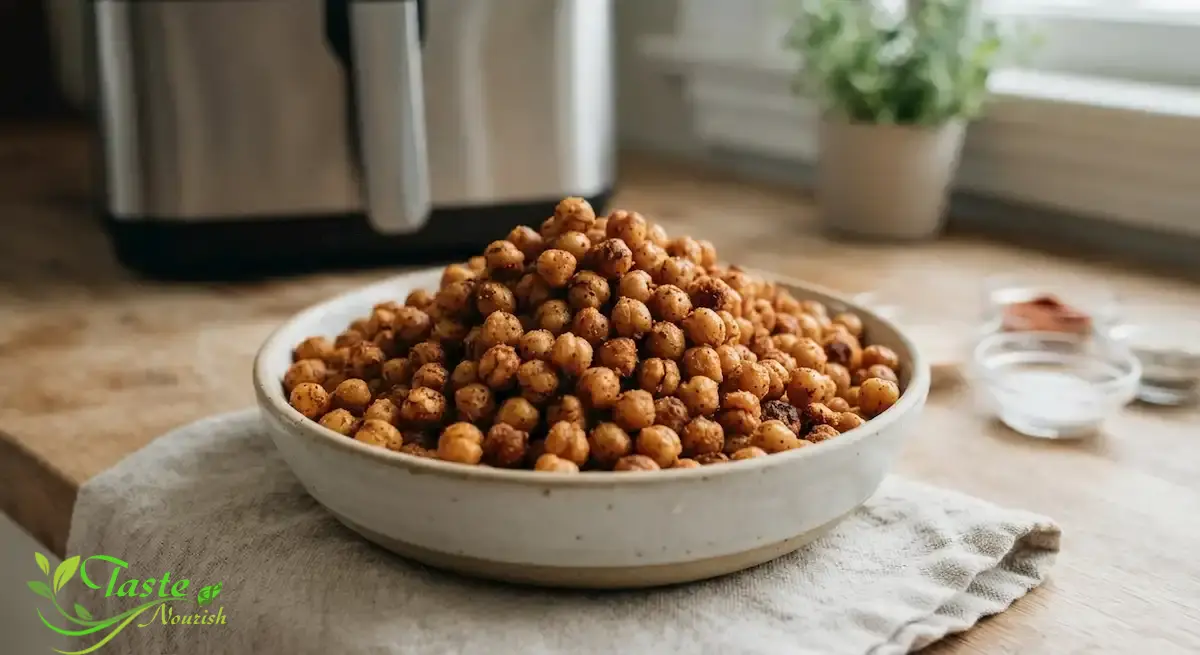
To make air fryer chickpeas, drain and rinse a can of chickpeas, then dry them thoroughly with a towel — this step matters more than any seasoning. Toss with a small amount of oil, air fry at 380°F to 400°F for 12 to 18 minutes, shaking the basket every 4 to 5 minutes, until the chickpeas are golden and firm with an audible crunch. Season with salt right away, and add delicate spices near the end of cooking so they don’t scorch.
Key Takeaways
Drying the chickpeas before they go in the basket is the single biggest factor in whether they turn out crispy.
Air fryer chickpeas cook fastest and crispest when spread in a single, uncrowded layer.
Salt and heat-stable spices (garlic powder, cumin, smoked paprika) can go on before cooking; anything with sugar or fine chili powder is safer added in the last few minutes.
These are best eaten within an hour or two of cooking — they soften as they sit, even at room temperature.
A quick re-crisp in the air fryer brings leftover chickpeas most of the way back to their original crunch.
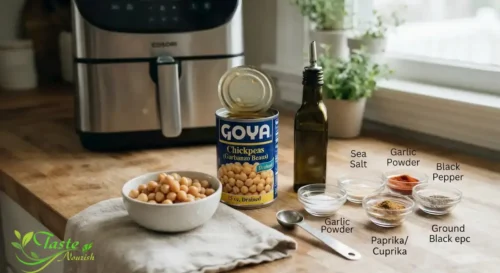
Ingredients
1 (15-ounce) can chickpeas (garbanzo beans), drained and rinsed
1 to 2 teaspoons olive oil
1/2 teaspoon fine sea salt
1/2 teaspoon garlic powder
1/2 teaspoon smoked paprika or ground cumin
1/8 teaspoon black pepper
Ingredient Notes
1 (15-ounce) can chickpeas (garbanzo beans), drained and rinsed — the base of the recipe. Look for a can with minimal added sodium if you want more control over seasoning; low-sodium and regular both work fine here.
1 to 2 teaspoons olive oil — helps the chickpeas brown and gives seasoning something to cling to. Avocado oil is a fine substitute if you prefer a higher smoke point.
1/2 teaspoon fine sea salt — adjust to taste. Fine salt sticks to the chickpeas more evenly than flaky salt.
1/2 teaspoon garlic powder — optional but recommended; it’s heat-stable and won’t burn during cooking.
1/2 teaspoon smoked paprika or ground cumin — optional, for depth. Either works well and both hold up to the air fryer’s heat.
1/8 teaspoon black pepper — optional, to taste.
This base recipe is intentionally simple. Once you’ve got the technique down, the Variations section below covers spicier, sweeter, and cheesier directions.
How to Prepare the Chickpeas
Preparation is where most air fryer chickpea recipes succeed or fail, so don’t skip or rush this part.
Drain and rinse. Empty the can into a colander and rinse under cool water for about 15 seconds. This removes the thick canning liquid (aquafaba) that would otherwise steam the chickpeas instead of letting them crisp.
Dry thoroughly. Spread the chickpeas on a clean kitchen towel or several layers of paper towel. Pat them dry, then let them sit for 5 to 10 minutes and pat again. Any surface moisture left on the chickpeas turns to steam in the air fryer, and steam is the enemy of crispness.
Remove loose skins (optional). As you dry the chickpeas, you’ll notice some skins have already come loose. Picking these out isn’t required, but chickpeas without their skins crisp up slightly more evenly, since the skin can trap a bit of moisture underneath.
How to Make Air Fryer Chickpeas
Toss with oil. Place the dried chickpeas in a bowl and add the olive oil. Toss until every chickpea has a thin, even coating. You want a light sheen, not a puddle of oil at the bottom of the bowl.
Add heat-stable seasoning. Sprinkle in the salt, garlic powder, and smoked paprika or cumin (if using), then toss again to distribute evenly.
Preheat the air fryer. Set it to 380°F to 400°F and let it run empty for 2 to 3 minutes. A preheated basket starts the crisping process immediately instead of gradually warming up around the chickpeas.
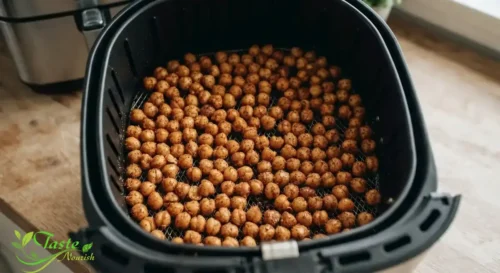
Load a single layer. Spread the chickpeas in the basket so they’re in one layer with a little space between them. If your basket is small, cook in two batches rather than piling them up.
Air fry, shaking often. Cook for 12 to 18 minutes total, shaking or stirring the basket every 4 to 5 minutes. The chickpeas are done when they’re golden brown, feel firm rather than springy when pressed, and make an audible crackling sound when the basket is shaken.
Season again while hot. Taste one (carefully — it’s hot) and add a bit more salt if needed. Salt sticks best to warm, freshly cooked chickpeas.
How to Get the Best Texture
Texture is the whole point of this recipe, so a few details are worth extra attention.
Dryness beats everything else. Oil, seasoning, and cook time all matter, but none of them compensate for chickpeas that went into the basket damp. If you’re short on time, even 5 minutes of air-drying makes a noticeable difference.
Don’t overcrowd the basket. Air fryers work by circulating hot air around the food. Chickpeas piled two or three deep block that airflow, trapping steam underneath and leaving the bottom layer soft no matter how long you cook them.
Shake, don’t just flip. A firm shake every few minutes redistributes the chickpeas and exposes different sides to the hottest airflow, which is what produces even, all-over crispness rather than a crisp top and a chewy bottom.
Let them rest for 2 to 3 minutes after cooking. Chickpeas continue to firm up slightly as they cool from the basket, similar to how roasted vegetables crisp further off the heat.
How to Get the Best Flavor
Because chickpeas are mild on their own, seasoning timing matters as much as the seasoning itself.
Salt goes on twice. A first pass before cooking seasons the chickpeas from the inside as they cook; a second light pass right after cooking sharpens the flavor, since salt adheres better to a warm, slightly oily surface than a cold one.
Ground spices like garlic powder, cumin, and smoked paprika can go in before cooking — they’re stable at air-fryer temperatures and won’t taste bitter or burnt by the time the chickpeas are done.
Finer or sugar-based seasonings (chili powder blends, cayenne, anything with a sweet element) are safer added in the last 2 to 3 minutes of cooking, or tossed on after the chickpeas come out. These scorch faster than the chickpeas themselves crisp, and burnt spice reads as bitter rather than spicy.
Cooking Method: Air Frying
Air frying works well for this recipe because the rapid, circulating hot air dries the exterior of the chickpeas quickly, which is exactly the effect you want.
Temperature — 380°F to 400°F. Lower temperatures dry the chickpeas too slowly, giving moisture time to escape unevenly; this range crisps the outside before the inside can turn mushy.
Time — 12 to 18 minutes, depending on your air fryer’s wattage and basket size. Start checking around the 12-minute mark.
Shaking — Every 4 to 5 minutes, minimum. Some air fryers run hotter in one spot than another, and shaking evens that out.
Doneness cues — Golden brown color, firm texture when pressed, and a light rattling sound when the basket is shaken. A chickpea that still feels soft or springy needs more time, not more seasoning.
How to Serve Air Fryer Chickpeas
Serve them warm, within an hour of cooking if possible — this is when the crunch is at its best. A shallow bowl works better than a deep one, since chickpeas piled too high will steam each other and soften faster.
They work well on their own as a hands-on snack, scattered over a salad in place of croutons, or set out alongside drinks before a meal. A small squeeze of lemon juice right before serving brightens the flavor without making them soggy, as long as it’s added just before eating rather than tossed in ahead of time.
Best Dips and Pairings
Because air fryer chickpeas are crisp and lightly seasoned rather than saucy, they pair well with dips that bring moisture and acidity:
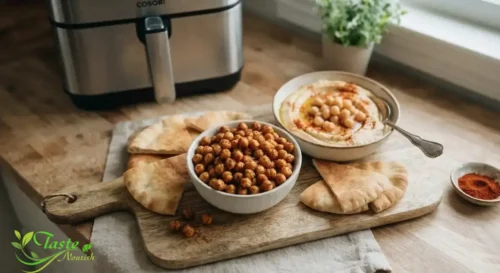
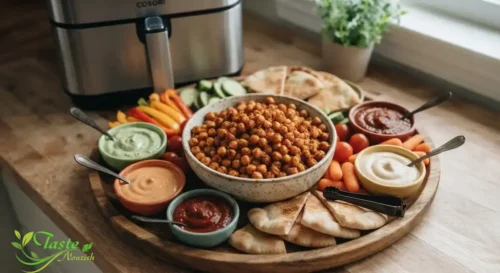
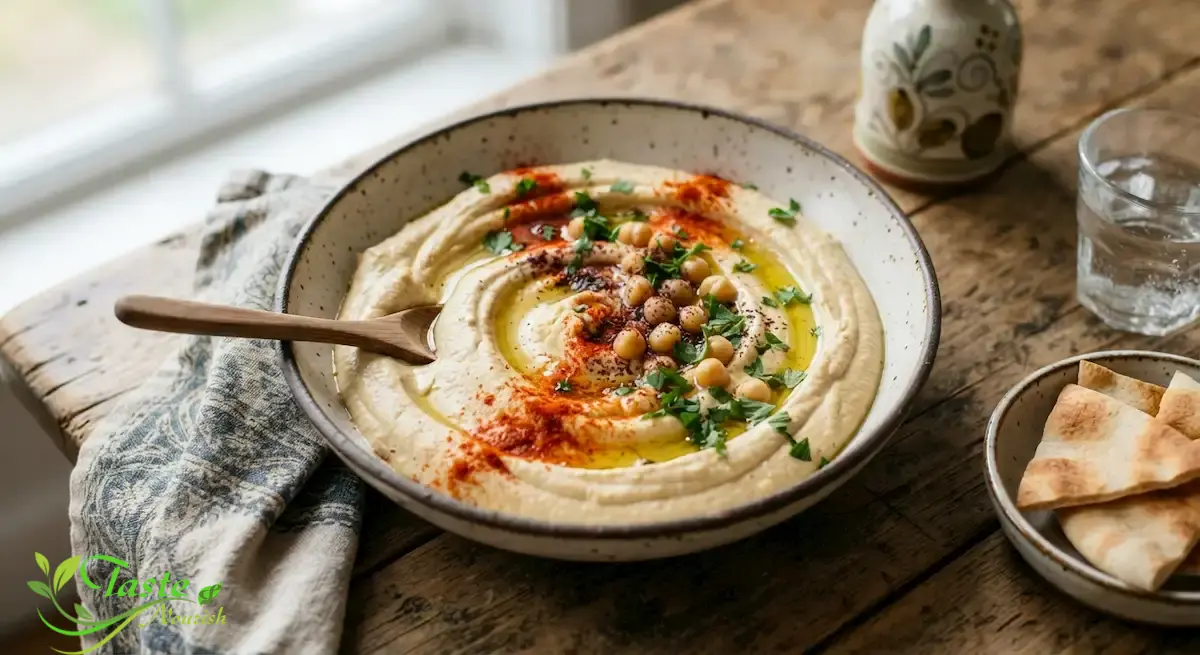
Hummus — a natural pairing, since it’s made from the same bean; the contrast in texture (crisp versus creamy) works well.
Tzatziki or a yogurt-based dip — the cool, tangy dairy balances the warm, savory chickpeas.
Tahini-lemon sauce — thin tahini with lemon juice and a little water for a quick dip with a nutty, bright flavor.
Spicy mayo or harissa yogurt — a good match if you’ve seasoned the chickpeas with smoked paprika or cumin.
Storage
Air fryer chickpeas are best enjoyed the same day they’re made. Store leftovers in a loosely covered container (not sealed airtight) at room temperature for up to a day; a fully sealed container traps residual moisture and softens them faster. Refrigerating them accelerates softening even further, since cold storage introduces condensation as the chickpeas warm back up — but if you do refrigerate leftovers, use them within a few days and reheat before eating.
How to Reheat Air Fryer Chickpeas
The air fryer is the best tool for bringing leftover chickpeas back to life. Spread them in a single layer and reheat at 350°F for 3 to 5 minutes, shaking once halfway through. This re-crisps the surface without drying the chickpeas out the way a microwave would — a microwave will warm them but leaves them soft, since it doesn’t remove surface moisture the way circulating hot air does.
Common Mistakes
Skipping the drying step. This happens when people rinse the chickpeas and go straight to the oil and seasoning. Any surface water turns to steam in the basket, which softens the chickpeas instead of crisping them. Pat them dry and let them air-dry for several minutes before cooking.
Overcrowding the basket. It’s tempting to cook the whole can at once to save time, but a deep pile blocks airflow to the bottom layer. Cook in batches if your basket is small.
Using too much oil. A heavy coating of oil doesn’t make chickpeas crispier — it makes them greasy and can cause uneven browning. A thin, even sheen is all that’s needed.
Adding delicate spices too early. Chili powder, sugar-based rubs, or finely ground spices can scorch over 12 to 18 minutes of cooking, turning bitter. Add these in the last few minutes or after cooking instead.
Not shaking the basket often enough. Chickpeas left undisturbed for the full cook time crisp unevenly, with some sides browning faster than others. Shake every 4 to 5 minutes.
Pulling them out too early. Chickpeas that look golden but still feel soft when pressed haven’t finished crisping. Give them another few minutes rather than judging by color alone.
Sealing warm leftovers in an airtight container. This traps steam from the residual heat and softens the chickpeas almost immediately. Let them cool slightly and store loosely covered instead.
Troubleshooting
Chickpeas aren’t crispy
Likely cause: leftover surface moisture, an overcrowded basket, or not enough cook time. Fix: return them to the air fryer for another 3 to 5 minutes in a single layer. Prevent next time: dry the chickpeas thoroughly before cooking and avoid stacking them in the basket.
Chickpeas turned soggy after cooling
Likely cause: this is largely expected — air fryer chickpeas naturally lose crispness as they sit, especially in a sealed container. Fix: re-crisp in the air fryer for a few minutes before serving. Prevent next time: serve them as soon as possible after cooking and store any leftovers loosely covered rather than sealed.
Chickpeas taste bitter or burnt
Likely cause: spices (especially chili powder or anything with sugar) were added before cooking and scorched over the long cook time. Fix: there’s no fixing an already-burnt batch, but for the next round, toss the sensitive seasonings in during the last few minutes instead. Prevent next time: reserve delicate spices for the end of cooking or after the chickpeas come out of the basket.
Chickpeas are unevenly cooked
Likely cause: infrequent shaking or an overloaded basket. Fix: shake the basket and give the softer ones another few minutes. Prevent next time: shake every 4 to 5 minutes and cook in batches if needed.
Variations
Spicy: add 1/4 to 1/2 teaspoon cayenne or chili powder in the last few minutes of cooking, or toss with hot sauce right after they come out.
Ranch-style: toss cooked chickpeas with a store-bought or homemade dry ranch seasoning blend while still warm.
Cinnamon-sugar (sweet): skip the savory spices and toss the warm, cooked chickpeas with a mix of cinnamon and a small amount of sugar for a sweet snack.
Cheesy, dairy-free: toss warm chickpeas with a spoonful of nutritional yeast along with the garlic powder and salt.
Curry-spiced: use curry powder in place of the paprika or cumin; it’s stable enough to go in before cooking.
Appetizer and Party Serving Ideas
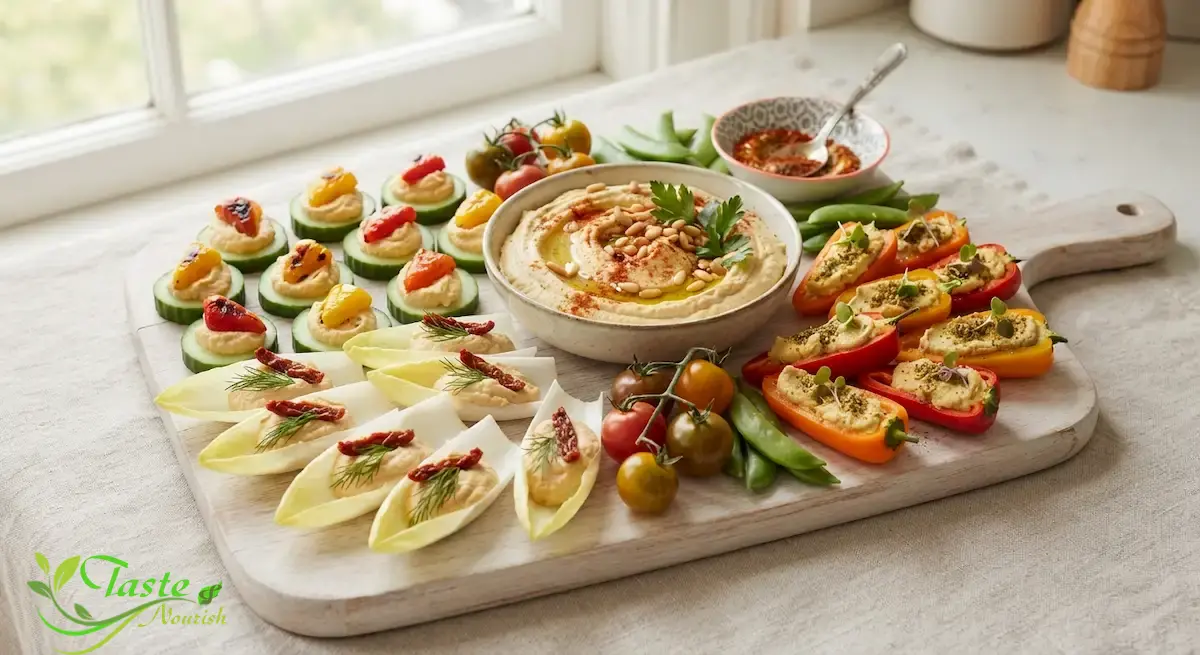
Air fryer chickpeas hold up well on a party spread as long as they’re cooked close to serving time. Set them out in a shallow bowl alongside hummus and pita for a Mediterranean-leaning snack board, or offer a couple of seasoning variations side by side — a spicy batch and a plain, lemon-finished batch — so guests can choose. They also make a good crunchy topping for a grazing table salad instead of croutons.
Air Fryer Chickpeas Recipe FAQs
Can I make air fryer chickpeas ahead of time?
They’re best cooked shortly before serving, since they lose crispness as they sit. If you need to prep ahead, drain, rinse, and dry the chickpeas in advance and refrigerate them, then air fry just before you plan to serve.
How do I keep air fryer chickpeas crispy?
Dry them thoroughly before cooking, avoid overcrowding the basket, and serve them within an hour or two. If they soften, a few minutes back in the air fryer restores most of the crunch.
Why are my air fryer chickpeas soggy?
The most common causes are leftover moisture on the chickpeas before cooking, an overcrowded basket, or not cooking them long enough. Sealing warm leftovers in an airtight container will also soften them quickly.
Can I use dried chickpeas instead of canned?
Yes, but they need to be soaked and fully cooked (boiled or pressure-cooked) until tender before air frying — raw dried chickpeas won’t cook through properly in an air fryer. Once they’re tender and well-dried, follow the same air-frying steps.
Do I need to remove the chickpea skins?
No, it’s optional. Removing loose skins can help the chickpeas crisp slightly more evenly, but plenty of good batches are made without bothering to peel them.
Can I freeze air fryer chickpeas?
Freezing isn’t recommended. The texture that makes this snack worthwhile — a crisp, dry exterior — doesn’t survive freezing and thawing, which reintroduces moisture and leaves the chickpeas soft.
What can I serve with air fryer chickpeas?
Hummus, tzatziki, a tahini-lemon sauce, or spicy yogurt dip all pair well. They also work scattered over a salad in place of croutons.
How long do air fryer chickpeas take to cook?
Generally 12 to 18 minutes at 380°F to 400°F, depending on your air fryer. Judge doneness by color and firmness rather than time alone, since air fryer models vary.
Conclusion
The technique behind good air fryer chickpeas comes down to a few controllable details: dry the chickpeas well, don’t crowd the basket, shake often, and time your seasoning so nothing scorches. Get those right and you’ll have a crunchy, high-protein snack that’s ready faster than most appetizers and easy to season however you like.
Hanan Abo Samra is the founder of Taste & Nourish, sharing trustworthy nutrition guidance and recipes drawn from 20+ years of hands-on cooking experience. When she's not developing new recipes, Hanan is researching the science behind everyday ingredients to bring readers practical, evidence-based guidance for a healthier lifestyle.