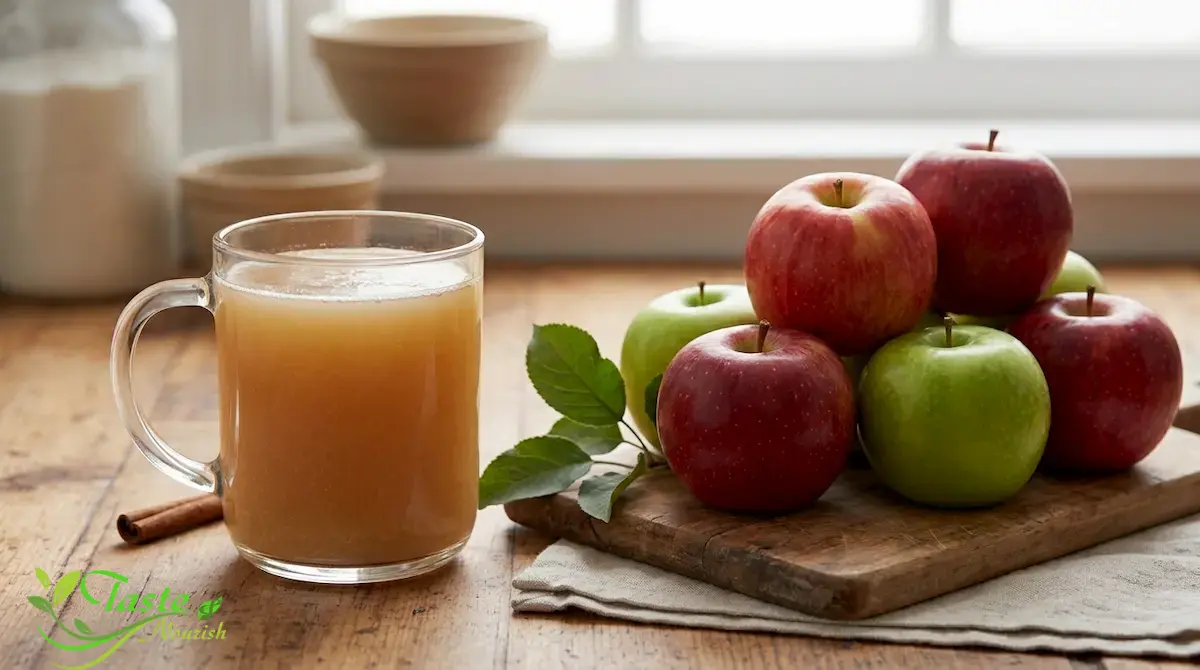
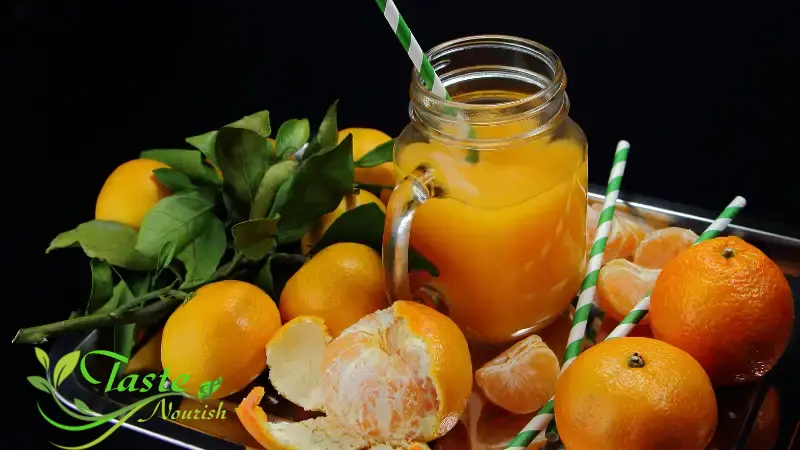
Few things say fall like a glass of cloudy, golden cider, and you don’t need an orchard press to make one. This homemade apple cider recipe turns a mix of sweet, aromatic, and tart apples into about a quart of fresh-tasting cider using just a blender and a nut milk bag. The apples balance each other, so the base recipe needs no added sugar. A short, thermometer-guided heating step makes the fresh juice safer to drink. Serve it cold, or warm it up with a cinnamon stick.
This homemade apple cider recipe turns about 4 pounds of mixed sweet and tart apples into roughly 1 quart of cloudy cider. Chop, blend, and squeeze the pulp through a nut milk bag, then heat the juice to 160°F, cool, and chill. No added sugar is needed.
Key Takeaways
This homemade apple cider recipe uses about 4 pounds of sweet, sweet-tart, and tart apples, which balance each other so most batches need no added sugar.
Blend to a coarse, wet pulp rather than a smooth paste, then squeeze it in batches until the pulp feels dry and crumbly.
Heat the juice to 160°F, confirmed with a thermometer, before chilling. Fresh juice can carry bacteria from the fruit.
Cloudiness and a little sediment are normal. Shake the jar before pouring.
Refrigerate and drink within 5 days, or freeze it for longer storage.
Why This Fresh Pressed Apple Cider Method Works
No press required. Four pounds of apples, a blender, and a nut milk bag give you about a quart of fresh-pressed-style cider.
The apple blend does the sweetening. Three apple types are balanced so the cider tastes sweet and bright without sugar.
Safety is part of the method. The heating step is written into the recipe, with a temperature and a stopping point.
One base, two ways to serve it. The same batch works as a cold glass of cider or as the starting point for hot spiced cider.
Apple Cider Nutrition
These values are approximate. They are based on USDA FoodData Central entries for unsweetened apple juice, so they are not laboratory-tested. Your numbers will shift with the apple varieties and their ripeness.
Approximate nutrition per 1-cup (8 fl oz) serving, no added sugar
Nutrient
Approximate Amount
Calories
115
Carbohydrates
28 g
Sugar (naturally occurring)
24 g
Added sugar
0 g
Fiber
Less than 1 g
Protein
Less than 1 g
Fat
0 g
Cider is a juice, so most of the whole apple’s fiber is left behind in the pulp. Its natural sugars are also concentrated into a smaller volume than in a whole apple. That doesn’t make it better or worse than eating an apple. It is simply a different food, and a 1-cup glass is a reasonable serving.
Choosing Apples for Cider
The apples matter more than any other part of this recipe. A single variety usually gives one-note cider. Mixing three roles gives depth:
Sweet apples (Fuji, Gala, Honeycrisp) supply sugar and juice.
Sweet-tart, aromatic apples (McIntosh, Jonathan, Cortland, Braeburn) supply the classic cider aroma. McIntosh also collapses easily when blended, so it releases juice readily.
Tart apples (Granny Smith) supply the acidity that keeps the cider from tasting syrupy.
Choose firm, fragrant fruit. Mealy or soft, flavorless apples make flat, watery cider. Avoid apples that have fallen on the ground, because they are more likely to carry contamination.
Homemade Apple Cider Recipe Ingredients
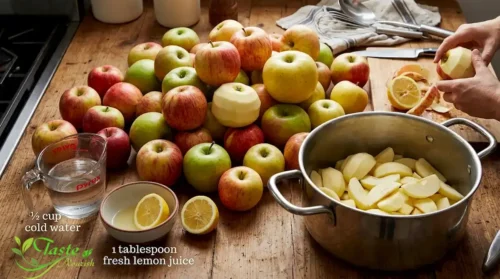
1½ pounds (680 g) sweet apples, such as Fuji, Gala, or Honeycrisp
1½ pounds (680 g) sweet-tart aromatic apples, such as McIntosh, Jonathan, or Cortland
1 pound (450 g) tart apples, such as Granny Smith
½ cup (120 ml) cold water, which helps the blender blades catch the fruit. It is kept low so the cider doesn’t taste diluted.
1 tablespoon (15 ml) fresh lemon juice, for brightness and to slow browning
Four pounds is roughly 10 to 12 medium apples. Leave the peel on for flavor and color, and wash the fruit well.
Equipment: blender or food processor, nut milk bag (or clean muslin or double-layer cheesecloth), large bowl, fine-mesh sieve, stainless steel pot, instant-read thermometer, and clean jars or bottles.
How to Make Homemade Apple Cider From Scratch
1. Wash your hands for at least 20 seconds with soap and warm water, as the FDA recommends for home juicing. Wash the bag, bowl, blender jar, knife, cutting board, and pot in hot soapy water and rinse well.
2. Sort the apples. Discard any that are rotten or wormy, and cut away bruised spots. Rinse the apples under running water, rubbing the skin with your hands. Use plain water rather than soap or produce wash, then dry them with a clean towel.
3. Quarter the apples, cut out the cores, and chop into 1-inch pieces. You should have about 15 cups. Coring keeps seeds and the tough center out of the blend, since they add bitterness.
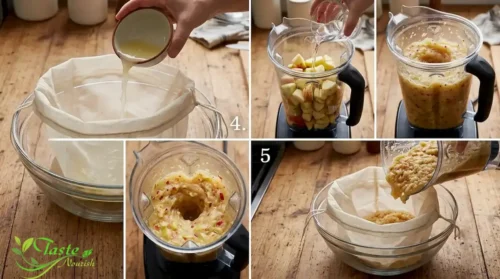
4. Pour the lemon juice into the large bowl, then set the nut milk bag inside it (or in a sieve over the bowl).
5. Blend in four batches, using about 4 cups of apple pieces and 2 tablespoons of water each time. Blend for 20 to 30 seconds, until the mixture looks like coarse, wet applesauce with small flecks. Stop before it becomes a smooth, foamy paste. Pour each batch into the bag.
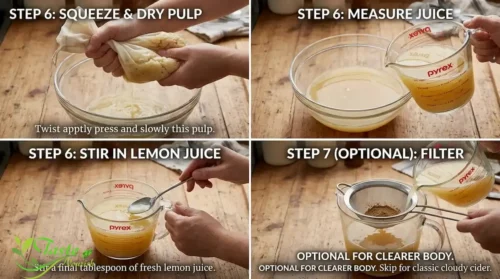
6. Gather the top of the bag, twist, and press slowly over the bowl until the pulp is dry and crumbly. Expect about 3½ to 4 cups of juice in total. Stir in the lemon juice.
7. Optional: pour the juice through a fine-mesh sieve to remove extra sediment. Cider is meant to be cloudy, so skip this if you like a fuller body.
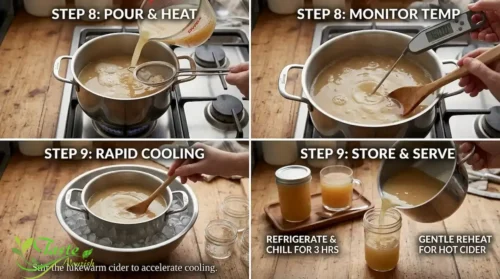
8. Pour the juice into the pot and skim off any heavy foam. Heat over medium, stirring, for about 8 to 10 minutes, until a thermometer in the center reads 160°F. Hold it between 160°F and 180°F for 1 minute without letting it boil. If you don’t have a thermometer, heat the juice just until small bubbles appear across the surface, which is the simmer point Oregon State University Extension gives as the fallback.
9. Set the pot in a bowl of ice water and stir for about 10 minutes, until lukewarm. Pour into clean jars and refrigerate. For cold cider, chill for at least 3 hours. For hot cider, reheat gently and serve right away.
Why Fresh Apple Cider Needs a Heat Step
When apples are juiced raw, bacteria from the surface of the fruit can end up in the cider. The FDA notes that children, older adults, pregnant women, and people with weakened immune systems risk serious illness from untreated juice. Oregon State University Extension advises heating the juice to at least 160°F. Washington State University Extension adds that the temperature should be confirmed with a thermometer.
This recipe holds the cider at 160°F for a full minute. The extension guidance cites a shorter minimum, so the extra time is a margin for thermometer error and uneven heat. Cooling it quickly afterward also helps. Don’t serve cider that has not been heated to anyone in the groups above. Refrigeration and freezing do not make untreated cider safe, according to Health Canada.
Staying below a boil also protects flavor. Gentle heat keeps most of the fresh apple aroma, while a hard boil tends to make cider taste cooked and flat.
Getting the Right Cider Texture
Homemade cider should look cloudy, with a pale golden to amber color and a slightly fuller body than clear apple juice. That body comes from fine apple solids suspended in the liquid, and some of them will settle to the bottom as it sits. Shake the jar before you pour.
Three things control the texture. Coarse pulp squeezes easily and releases more juice. A smooth paste clogs the bag and sends fine sediment through the weave. Slow, steady pressure in the bag works better than quick squeezes. If you want a clearer drink, strain twice through a fine-mesh sieve lined with a double layer of cheesecloth. It will still be juice, just a lighter one. A skimmed pot also gives a smoother pour, since the foam is mostly trapped air and fine pulp.
How to Adjust the Flavor
Too sweet — Stir in lemon juice 1 teaspoon at a time, or thin the glass with cold or sparkling water. In the next batch, swap 1 pound of sweet apples for tart ones.
Too tart or sharp — Stir 1 to 2 teaspoons of maple syrup or sugar into the warm cider so it dissolves. For the next batch, use fewer tart apples and more sweet ones.
Flat or bland — The apples were probably underripe, mealy, or all one variety. Add 1 to 2 teaspoons of lemon juice to lift it, and include an aromatic apple like McIntosh next time.
Tastes cooked or jammy — The cider got too hot or stayed hot too long. Hold it at 160°F to 180°F for just 1 minute and cool it quickly in an ice bath.
Bitter — Cores and seeds were blended in, or the batch relied too heavily on very green apples. Core thoroughly and cut back on the tart apples.
Too thin or watery — Too much water went into the blender, or the pulp wasn’t squeezed hard enough. Stay at ½ cup of total water and press until the pulp is crumbly.
Too gritty or pulpy — The apples were blended too fine. Pass the cider through a sieve lined with double-layer cheesecloth.
No Blender? Use a Juicer or Press
A juicer or cider press can replace the blending and squeezing steps. Wash and core the apples, run them through the machine, and stir the lemon juice into the juice as it collects. Yield varies by machine. Then follow the same heating, cooling, and storage steps. Foam is common with juicers, so skim it off before heating.
Variations
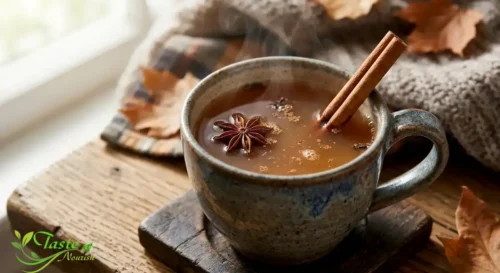
Mulled hot cider: To 4 cups of cider, add 1 cinnamon stick, 4 whole cloves, 1 star anise, and 2 strips of orange zest. Keep it between 160°F and 180°F for 15 minutes, then strain. Leave the spices out of any cider you plan to store, since they keep infusing and turn bitter.
Pear-apple cider: Replace 1 pound of the apples with ripe pears. The cider turns softer and more floral, and it carries a bit more pulp.
Cider spritz: Pour ½ cup of chilled cider over ice and top with ½ cup of cold sparkling water. It is lighter and less sweet, which suits readers who find a full glass too rich.
Serving Suggestions
For cold cider, chill it thoroughly and pour it into a chilled glass instead of loading it with ice. Ice melts quickly and thins the flavor. For hot cider, reheat gently to steaming rather than boiling and serve in a mug with a cinnamon stick. Sharp cheddar, cinnamon doughnuts, and oatmeal cookies are all good partners, since the cider’s acidity cuts through rich or fatty foods.
How to Store Homemade Apple Cider
Once cooled, keep the cider in clean, tightly closed glass jars or bottles in the refrigerator at 40°F or below. Plan to drink it within 5 days, which matches Washington State University Extension’s guidance. Some extension sources allow up to a week for heat-treated cider, but a homemade batch has no commercial controls, so 5 days is the safer window. The color will darken slightly and the fresh-apple edge will fade over that time. Sediment will also settle, so shake before pouring.
Don’t leave the cider at room temperature for long periods, since that invites spoilage and fermentation. If the container is fizzing, the lid is bulging, or the cider smells yeasty, sour, or like alcohol, throw it out. Never taste cider to decide whether it is safe.
Can You Freeze Homemade Apple Cider?
Yes, and freezing is the better choice for anything you won’t drink within 5 days. Oregon State University Extension recommends freezing for longer storage. Heat and cool the cider as written first, then pour it into freezer-safe containers and leave about 1 inch of headspace so the liquid can expand.
For the best flavor, use it within a few months. Thaw it in the refrigerator, shake or stir to recombine the sediment, and treat it like fresh cider afterward by drinking it within a few days. The flavor will be slightly duller, and the sediment will be more noticeable.
Common Mistakes
Using fallen or damaged apples. They carry a higher contamination risk. Sort carefully and cut away bruises.
Guessing the temperature. Warm is not hot enough. Use a thermometer in the center of the pot.
Boiling the cider. A hard boil flattens the aroma. Stop at 160°F to 180°F.
Blending to a smooth paste. This clogs the bag and clouds the juice with fine grit. Stop at a coarse, wet pulp.
Using only one apple variety. A single type tends to taste flat or sharp. Blend sweet, aromatic, and tart apples.
Skipping the squeeze. Gentle pressing leaves juice in the pulp. Twist and press until the pulp is crumbly.
Homemade apple cider recipe FAQs
Can I use store-bought apple juice instead of making it from scratch?
You can, but the result won’t be the same. Bottled juice is already clear and filtered, so it lacks the body and sediment of cider. It does work well as a base for mulled spices.
Is this the same as simmering apples with spices in water?
No. Simmering apple pieces in water extracts flavor into a diluted, spiced infusion. This recipe extracts actual juice, so the cider tastes more concentrated and fresher.
How many apples do I need for a gallon?
The blender method yields about 1 quart per 4 pounds of apples, so a gallon takes about 16 pounds. Work in batches, use a larger pot, and expect a longer heating time.
Will homemade apple cider turn alcoholic?
If left unrefrigerated, it can ferment and develop alcohol. This recipe is meant to stay non-alcoholic when heated, chilled promptly, and used within the storage windows above.
Can I can it for shelf storage?
This recipe is written for the refrigerator and freezer only. Shelf-stable canning requires different heat and processing steps. Follow a tested guide such as the one from Oregon State University Extension or your local extension service.
Cloudy, naturally sweet apple cider made from about 4 pounds of mixed sweet, sweet-tart, and tart apples using a blender and a nut milk bag, then heated to 160°F and chilled.
Ingredients
1½ pounds (680 g) sweet apples, such as Fuji, Gala, or Honeycrisp
1½ pounds (680 g) sweet-tart aromatic apples, such as McIntosh, Jonathan, or Cortland
1 pound (450 g) tart apples, such as Granny Smith
½ cup (120 ml) cold water
1 tablespoon (15 ml) fresh lemon juice
Directions
Wash your hands for at least 20 seconds with soap and warm water. Wash the bag, bowl, blender jar, knife, cutting board, and pot in hot soapy water and rinse well.
Sort the apples, discarding any that are rotten or wormy and cutting away bruised spots. Rinse under running water, rubbing the skin, then dry with a clean towel.
Quarter the apples, cut out the cores, and chop into 1-inch pieces, leaving the peel on. You should have about 15 cups.
Pour the lemon juice into a large bowl and set a nut milk bag inside it or in a sieve over the bowl.
Blend the apples in four batches, using about 4 cups of apple pieces and 2 tablespoons of water each time. Blend for 20 to 30 seconds until the mixture looks like coarse, wet applesauce, then pour each batch into the bag.
Twist and press the bag slowly over the bowl until the pulp is dry and crumbly. Expect about 3½ to 4 cups of juice, then stir in the lemon juice.
Optional: pour the juice through a fine-mesh sieve to remove extra sediment.
Pour the juice into a pot and skim off any heavy foam. Heat over medium, stirring, until a thermometer in the center reads 160°F. Hold it between 160°F and 180°F for 1 minute without boiling.
Set the pot in a bowl of ice water and stir for about 10 minutes until lukewarm. Pour into clean jars and refrigerate. Chill for at least 3 hours for cold cider, or reheat gently to serve hot.
Notes
Do not serve unheated cider to children, pregnant women, older adults, or people with weakened immune systems.
Refrigerate at 40°F or below and use within 5 days. Freeze for longer storage.
Nutrition is approximate and based on unsweetened apple juice values.
Conclusion
This homemade apple cider recipe works because a blend of sweet, aromatic, and tart apples makes sugar unnecessary, and a short, controlled heat step makes the fresh juice safer to drink. For the best flavor, stop at a coarse pulp, squeeze it until it’s crumbly, and take the cider off the heat as soon as it has held 160°F for a minute.
**Hanan Abo Samra** shares practical cooking insights, delicious recipes, and evidence-based nutrition information. Drawing on more than 20 years of hands-on cooking experience, she creates helpful food content that combines everyday cooking knowledge with information from reliable scientific sources. Her goal is to help readers better understand the foods they eat, explore their nutritional benefits, and prepare delicious meals with confidence.